Board Views
Board Views allow you to get an at-a-glance look at your Records, by grouping them into columns and rows. Board Views may be useful for:
-
To Do List
Group your tasks into columns to track what is To Do, In Progress and Done
-
Opportunity Tracking
Show the progress of each of your sales opportunities, grouping by their status and sales region
-
Roadmap Planning
Group features to develop by delivery phase and delivery team
For more ideas and examples, see our Board Guides.

TIP
You can create as many Boards as you like in your Projects. You can also create multiple Boards for the same Table to allow you to get different views of the same data.
Creating Board Views
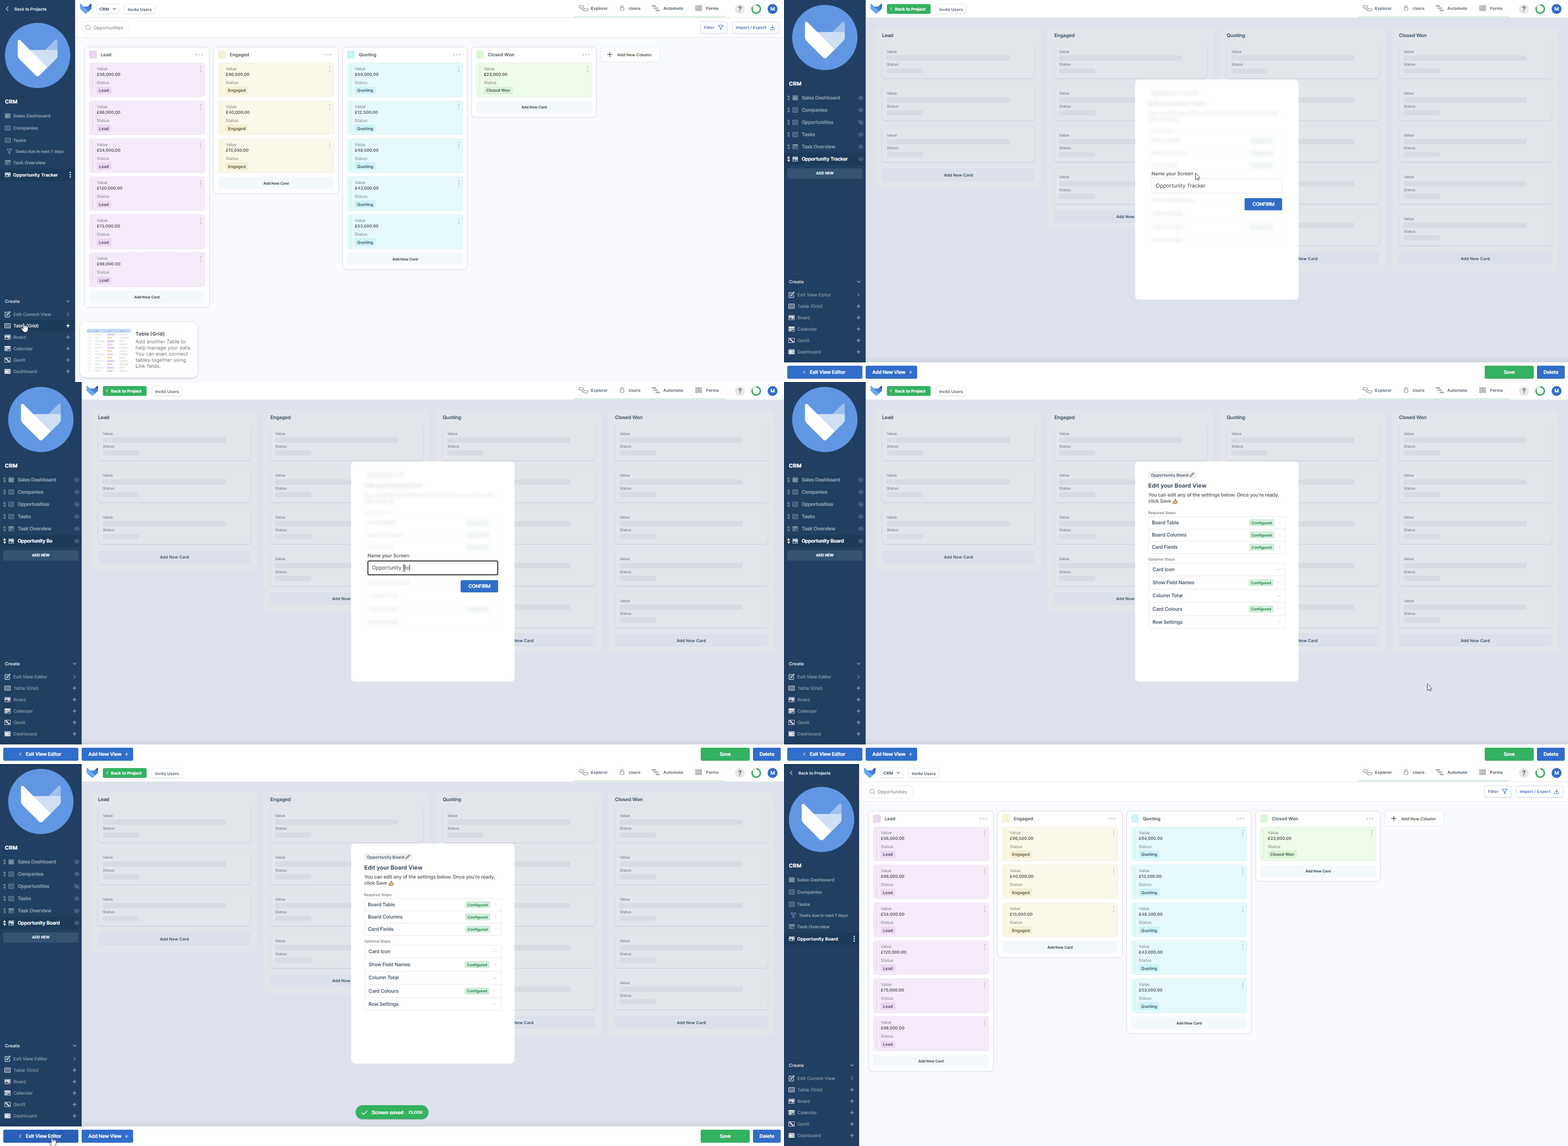
- Open the Create menu in the bottom left hand corner
- Click Board
- Enter a name for the Board View
- Click the next arrow
TIP
You can use Ctrl + \ to open the Create menu if it is currently collapsed.

You will now be guided through the steps to configure your new Board.
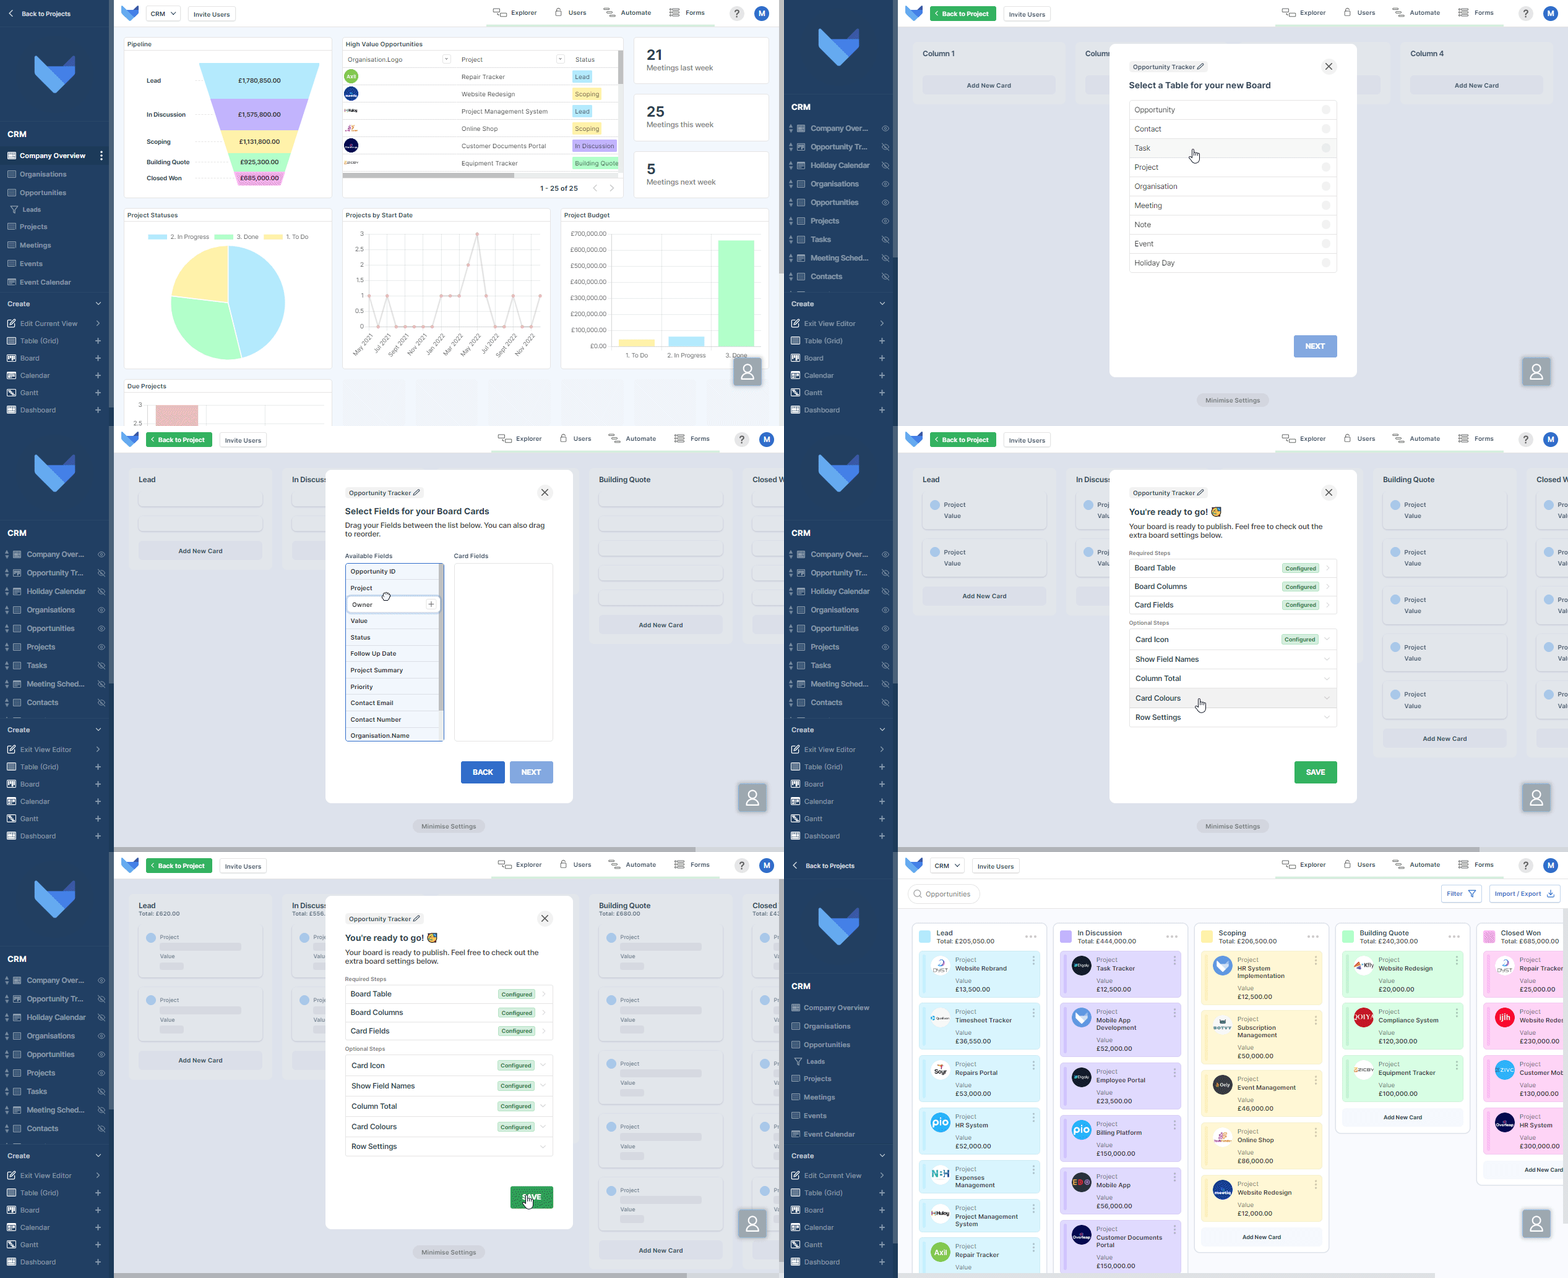
- Choose the Table that your Board should show Records from, then click Next
-
Choose which columns your Records should be grouped into
The Records in the Table can be grouped by a Field of one of the following Types: List, User, User Group or linked Parent
Select the appropriate Field from the list and click Next.
Alternatively, you can create a new List Field to group by by selecting the Create New option
-
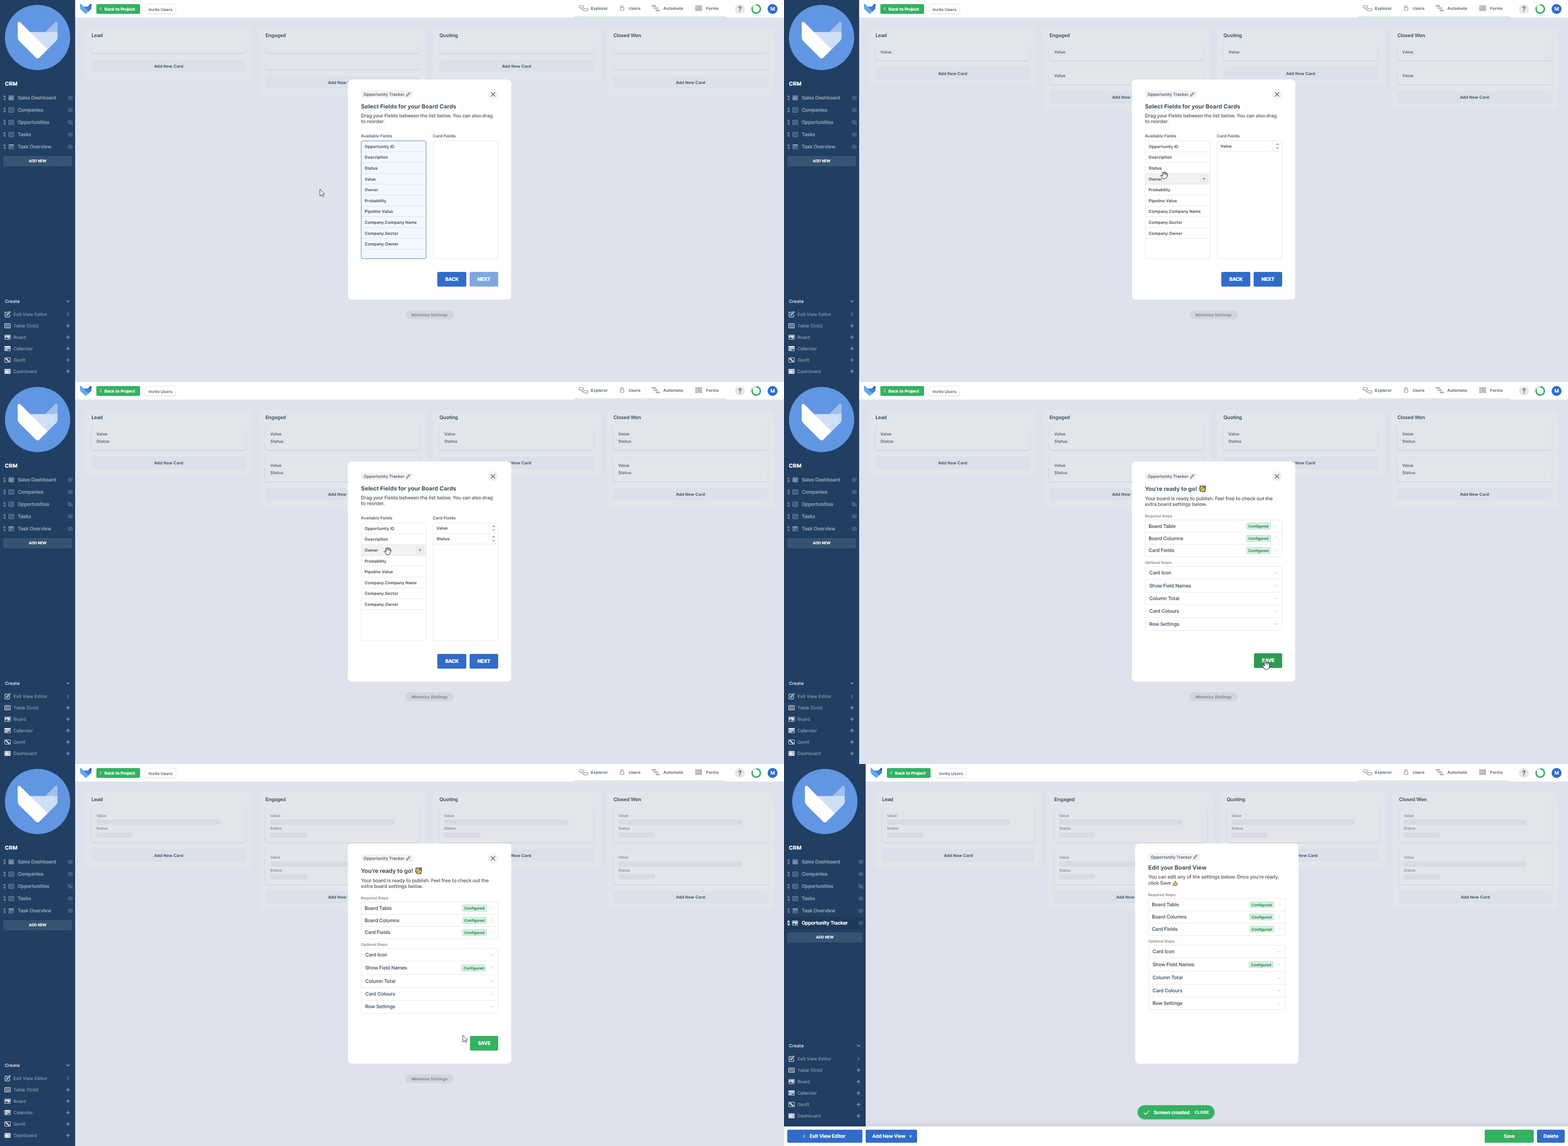
Choose the information that should show about each Record by specifying the Fields that should be shown on a Board card
Drag the fields from the Available Fields column into the Card Fields column, then click Next
- Click Save

Additional Board Settings
To customise your Board further, take a look at the additional settings available in the Optional Steps section of the Board configuration.
Card Icon
You can choose an icon to show on each of the Board cards. This can be an Icon Field from the Table, or alternatively you can show the initials of any User Field from the Table.
Show Field Names
You can choose to show or hide Field Names that feature in your Cards. To configure this setting, simply click the drop down menu and select either Show or Hide.
NOTE
Field Names are configured to not show by default so you will need to configure this optional setting if you wish to show them.
Column Total
It may be useful to see the total value of Records in a column. For example, if you have a Board of sales opportunities, you can show the total value of opportunities in each of the stages.
Select a number or money field in the Column Total section.
NOTE
If you have also divided your Board into rows, a total will be shown for each column and row combination.
Card Colours
The Board cards can be colour coded to help your users understand the data at a glance.
Select a List, User or Group Field to control the colour which is applied to each card.
Row Settings
A Board can be divided into rows as well as columns. You can specify which Field to group the Records by in the Row Settings section.
The Records can be grouped by a List Field, a User Field, a Group Field, or by Parent.
Updating Board Views
- Navigate to the Board that you wish to edit
- Open the Create menu in the bottom left hand corner
-
Click Edit Current View
Alternatively open the View menu and click Edit
- Make any changes that are needed
- Click Save
Changes will take effect immediately for your users.
Renaming a Board
To change the name of one of your Board, first click on the View Editor. This will bring up the settings panel for your Board. From here, simply click the title section at the top of this panel and edit as required. Once you are finished renaming, click Confirm. Then click Save to publish the changes.
TIP
Use the shortcut Ctrl + space to quickly open View Editor.

Updating a Board when using a Board
If you need to make quick changes to a Board whilst you are using it, provided the Board has been grouped by a List Field, you can:
- Rename an existing list item by clicking into the column title
- Add a new list item using the Add New Column button
- Remove an existing list item by using the Delete Column item in the column settings menu
- Reorder list items by dragging and dropping the columns.
Also, if the Board has been colour coded by the List Item, you can choose a new colour for a list item using the colour square in the column header.
Deleting Board Views
NOTE
Deleting a Board cannot be undone.
- Select the Board that you would like to delete from the left hand navigation menu
- Open the Create menu in the bottom left hand corner
- Click Edit Current View
- Click Delete in the bottom right hand corner
- Confirm the action by clicking Delete again
Alternatively, you can delete a Board using the View menu
- Open the View menu for the Board you wish to delete
- Click Delete
- Confirm the action by clicking Delete again
