Saved Filters
For your Views, you can create Saved Filters. These will show a subset of the Records based on the filter conditions that you apply. Saved Filters show up in the left hand navigation bar for your Users. They are a quick way to get access to the data you regularly need. For example, you could create a Saved Filter for all the Tasks due this week to make sure people can prioritise their work accordingly.
The Saved Filters that you create can be utilised on your Dashboard Charts and in Workflows.
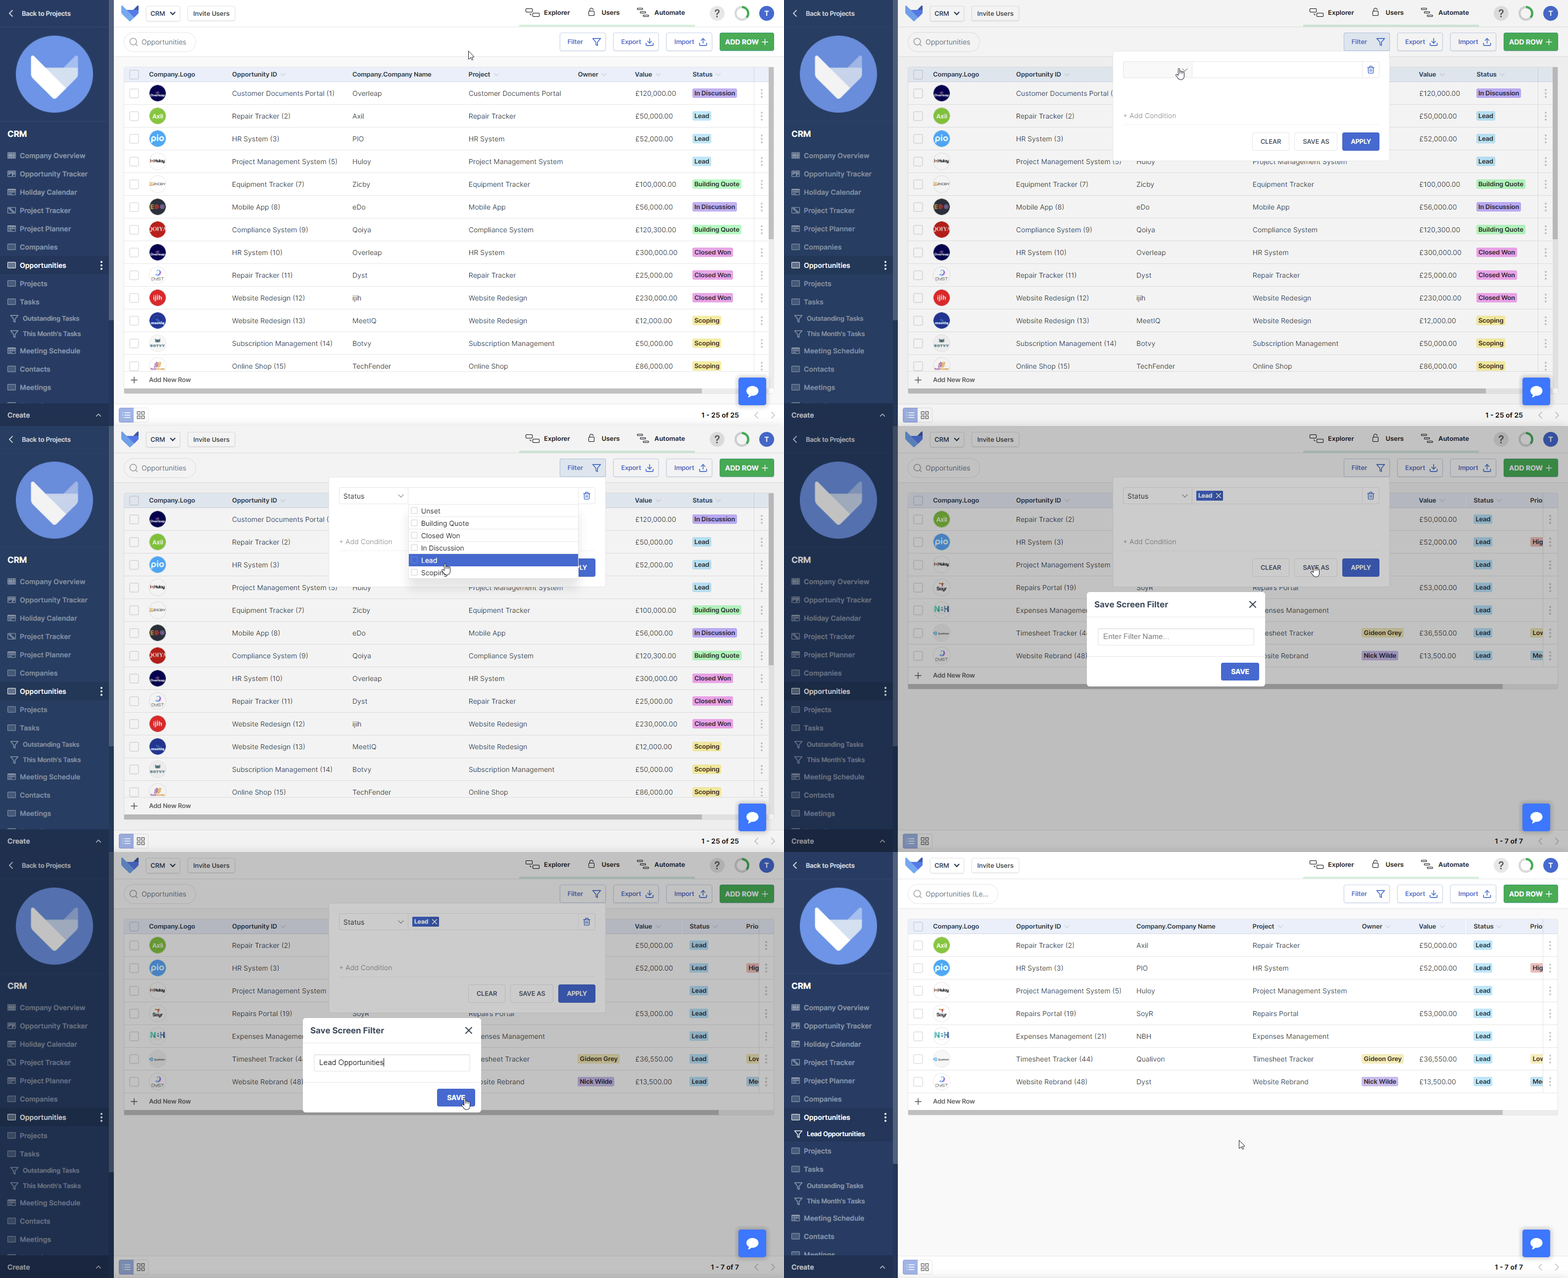
Creating a Saved Filter
- Navigate to the View that you wish to create the Filter for
- Click Filter in the top right hand corner
- Add the filter conditions that you require
- Click Save As
- Enter a name for the Filter
- Click Save

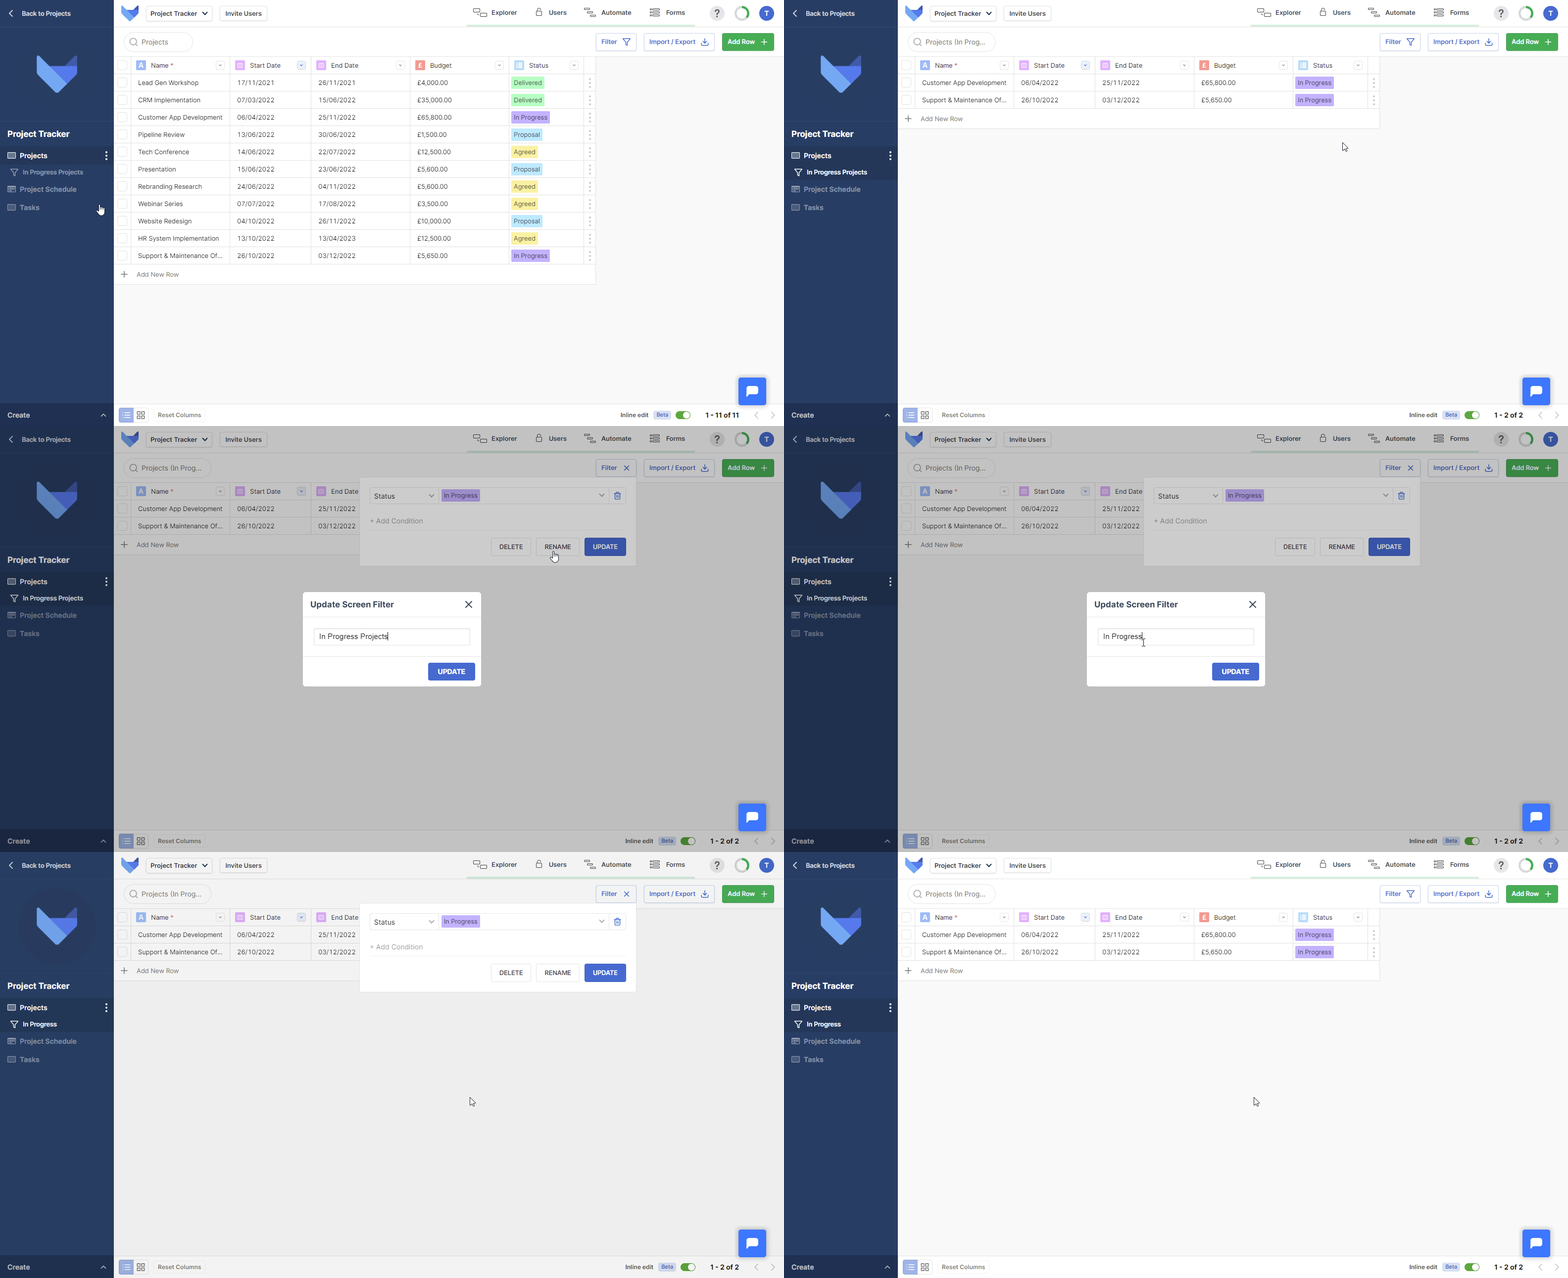
Renaming a Saved Filter
- Select the Filter that you would like to rename from the left hand navigation bar
- Click Filter in the top right hand corner
- Click Rename
- Enter a new name for your Filter
- Click Update

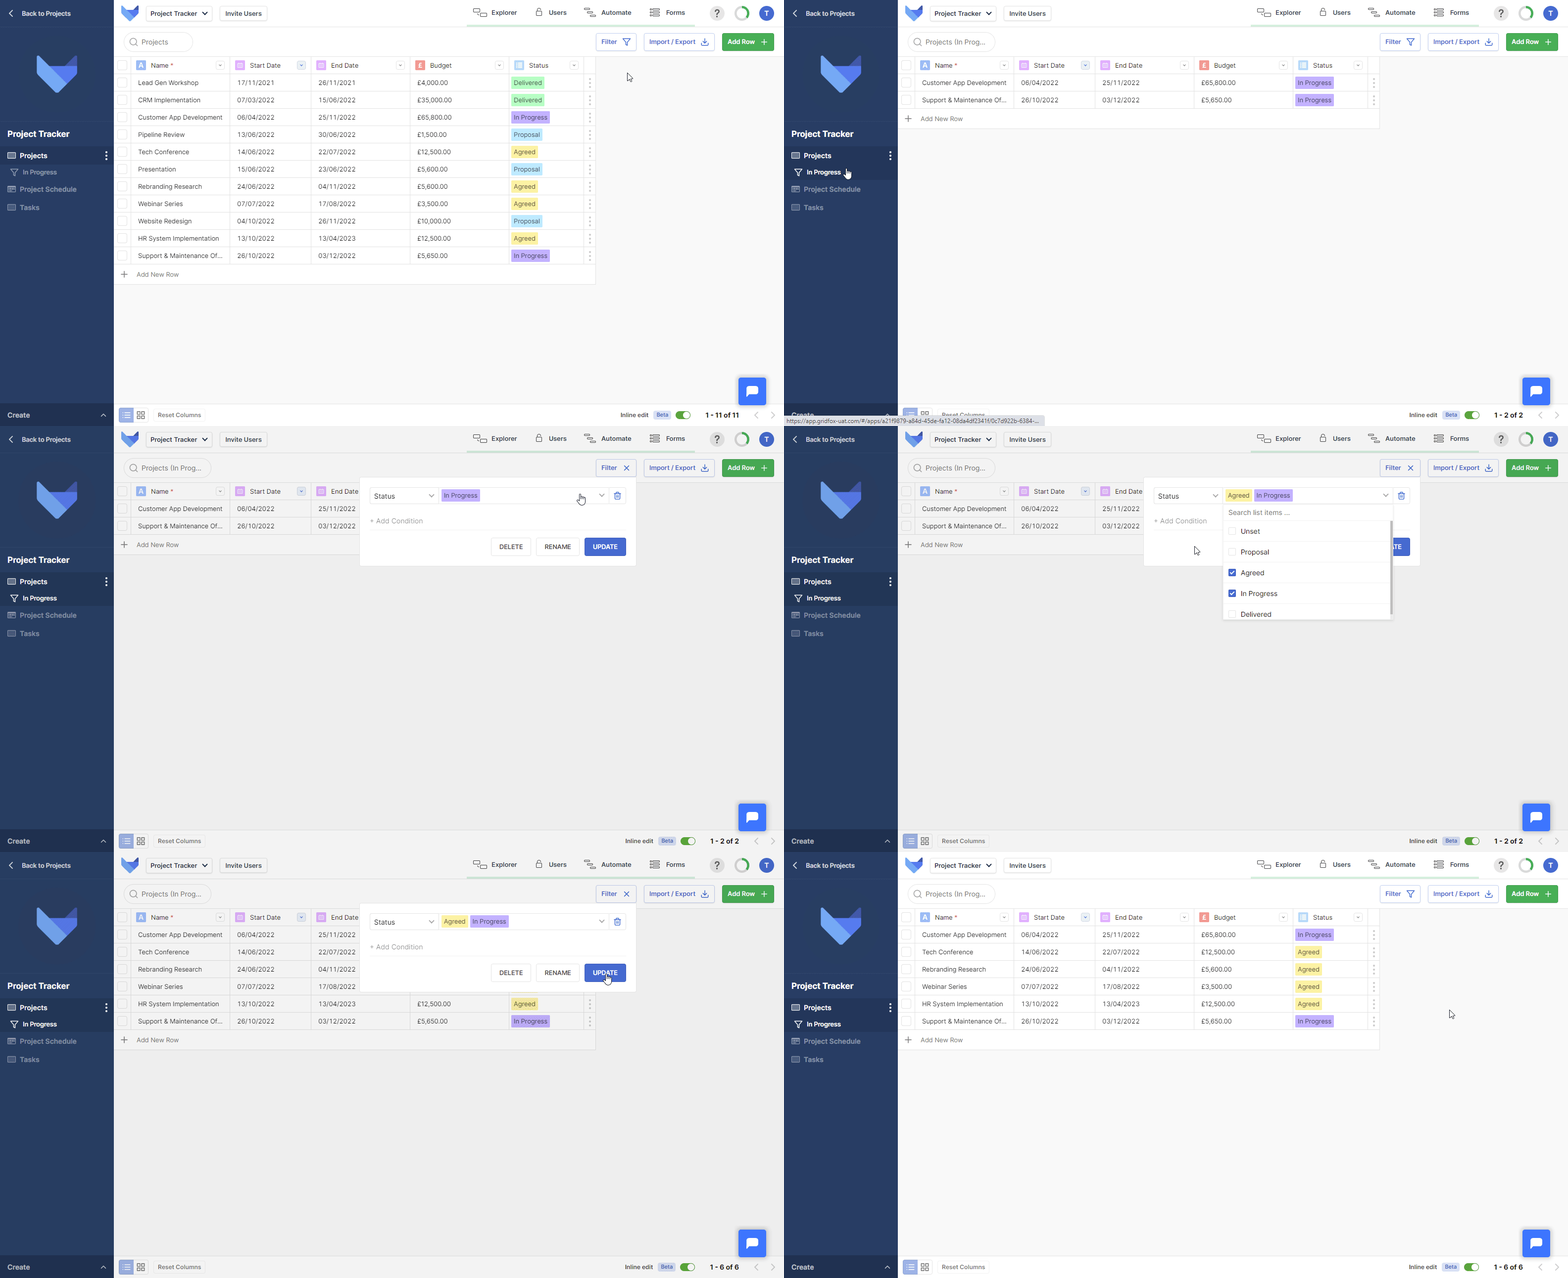
Updating a Saved Filter
You can amend the filter conditions for an existing Saved Filter.
- Select the Filter that you would like to change from the left hand navigation bar
- Click Filter in the top right hand corner
- Add, remove or change the filter conditions
- Click Update

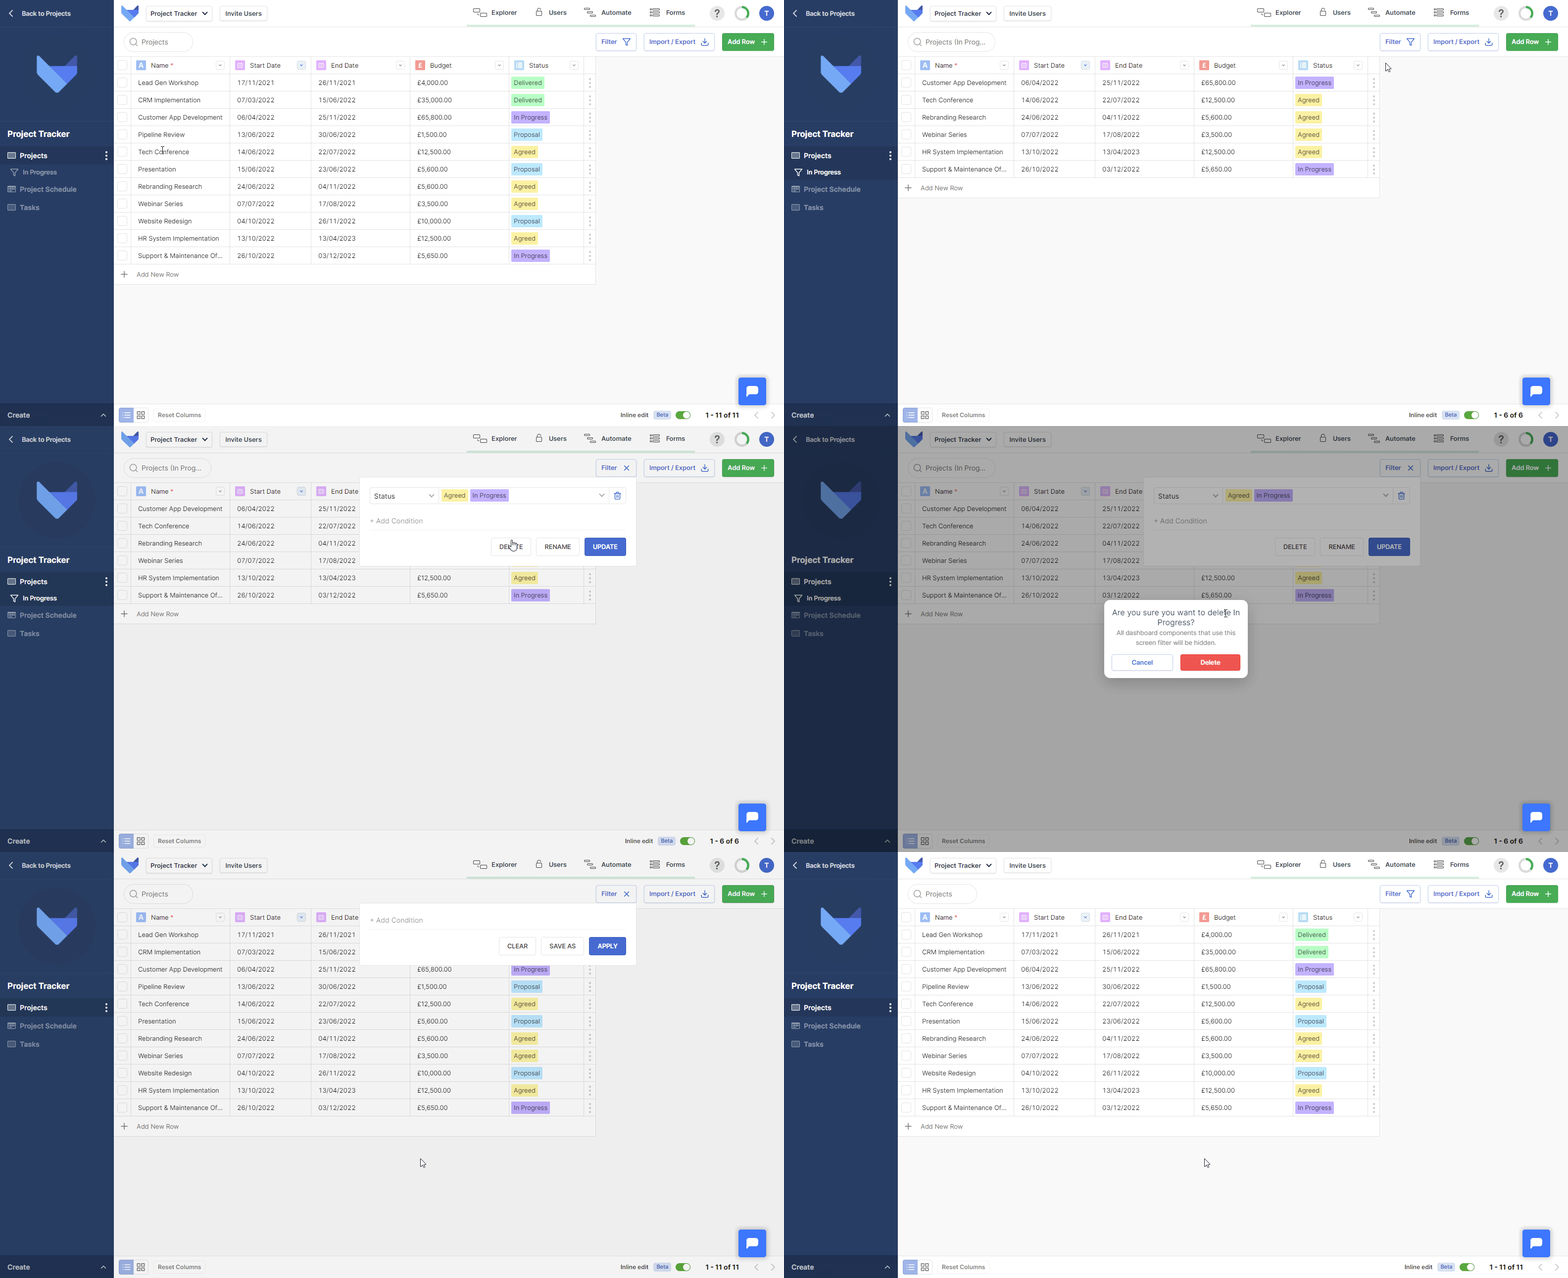
Deleting a Saved Filter
- Select the Filter that you would like to delete from the left hand navigation bar
- Click Filter in the top right hand corner
- Click Delete
- Click Delete again to confirm the action

