Inviting Users to a Project
Once a Project has been configured, the Users can then be invited to the Project.
Before you invite any Users, ensure that appropriate Groups have been set up to control the permissions of the Users.
NOTE
To invite Users to a Project, you must be an Account Admin for the Account that the Project is in, or you must be a Project Admin for the Project.
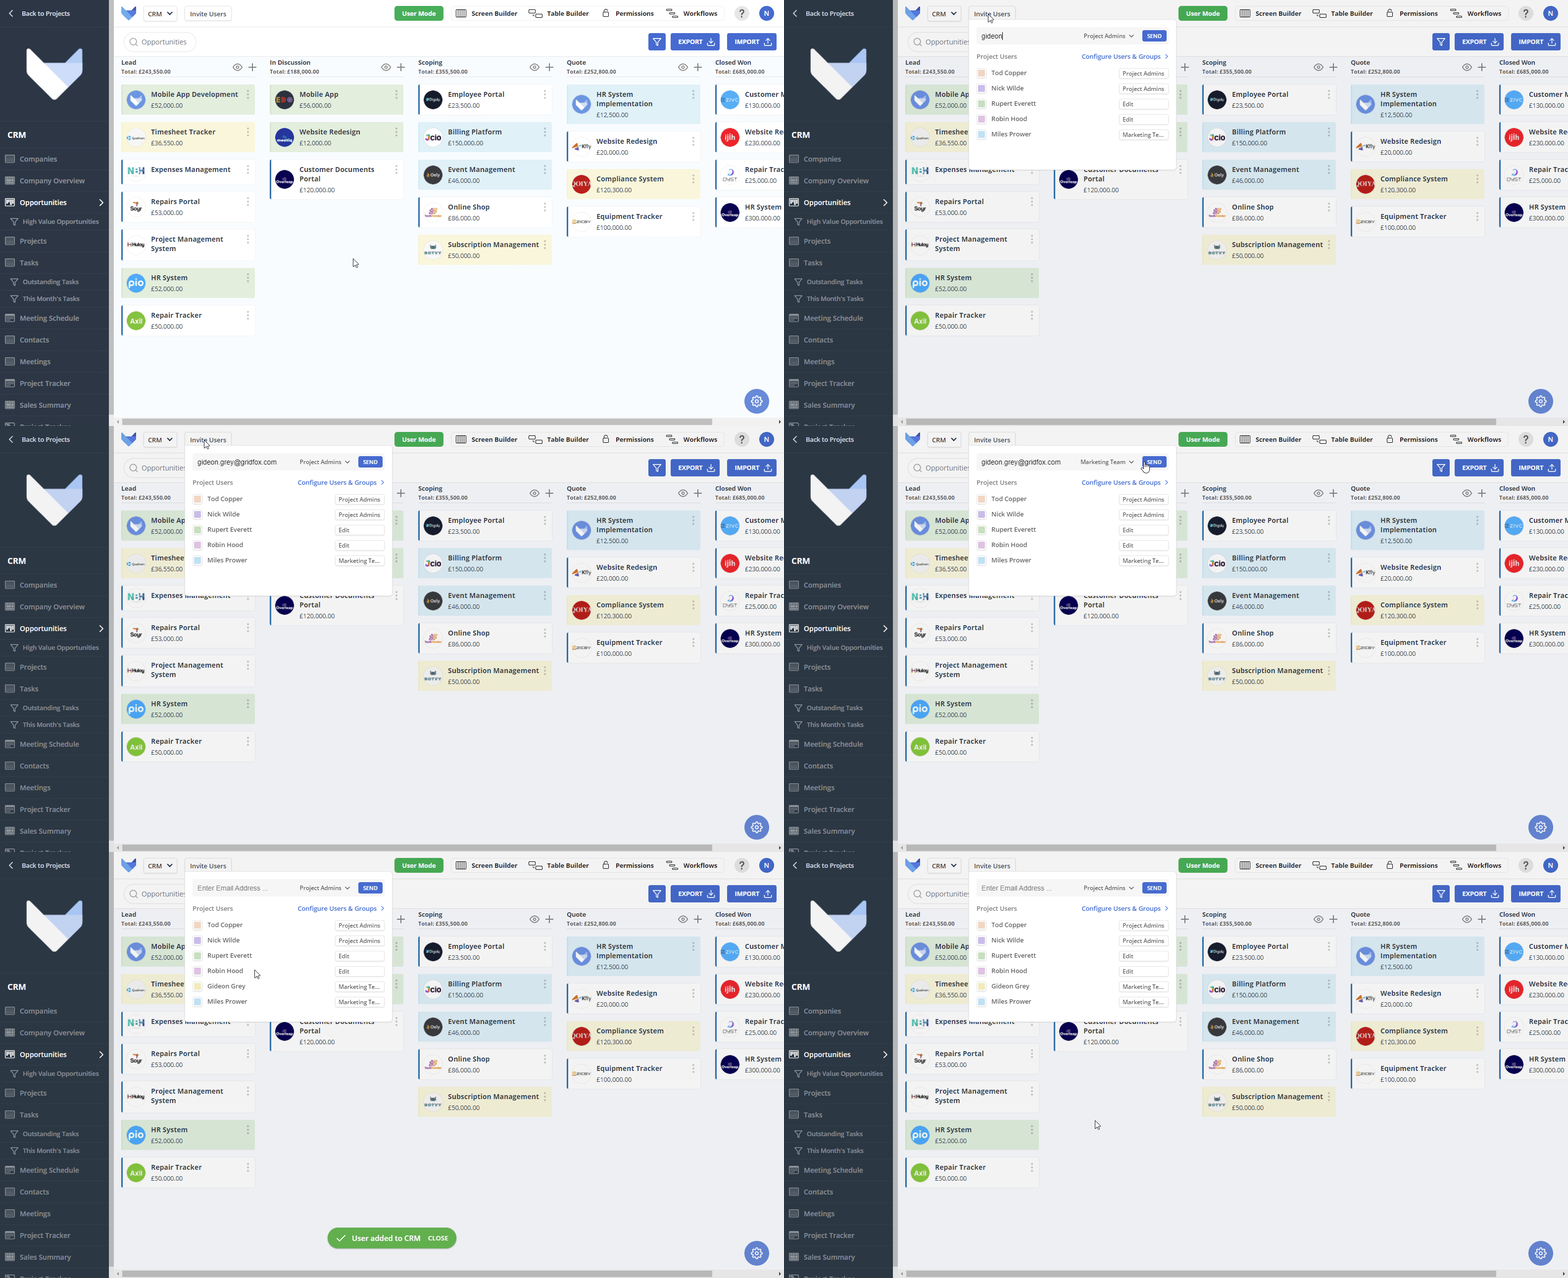
Open up the Project that you would like to invite a User to and click Invite Users in the top left corner.

Enter the email address of the person that you would like to invite, choose the Group they should be added to and click Send.

An email invite will be sent to the User to inform them that they have been added to the Project.
If the invited User already has a Gridfox Account, they will be able to see the Project straightaway on their homepage.
If the invited User does not already have a Gridfox Account, they will be guided to the registration process which they must complete before they have access to the Project.
NOTE
The number of users that can be invited to a Project is limited by the number of Seats purchased in the Account Gridfox Subscription. Contact the Account Owner to upgrade the Account so that more Users can be invited.
You can also invite users from the Users page.
Start by selecting the Users button in the top right hand corner of your Project.

The Users page will show a list of Users currently in your Project, and which Group each are in.
To invite a new person to the Project, either as a Project Admin or Project User, click the Invite User button in the top right.
TIP
To invite someone to be an Account Admin, use the Account page instead. See the help page for inviting Account Admins for more information.
Enter the email address of the person that you could like to invite. Choose the Group they should be in from the dropdown and click Send.
The invite will be sent to the User in the exact same way as using the Invite User button in the top right.
Colour Coding Users
All Users in the Project can be assigned a colour to help quickly identify Records which may be assigned to them.
For example, if a Table has a User Field added, when colours are assigned to Users then this colour coding will show when anyone is viewing those Records. You can optionally colour code calendar events, board cards and Gantt blocks by the assigned User also.
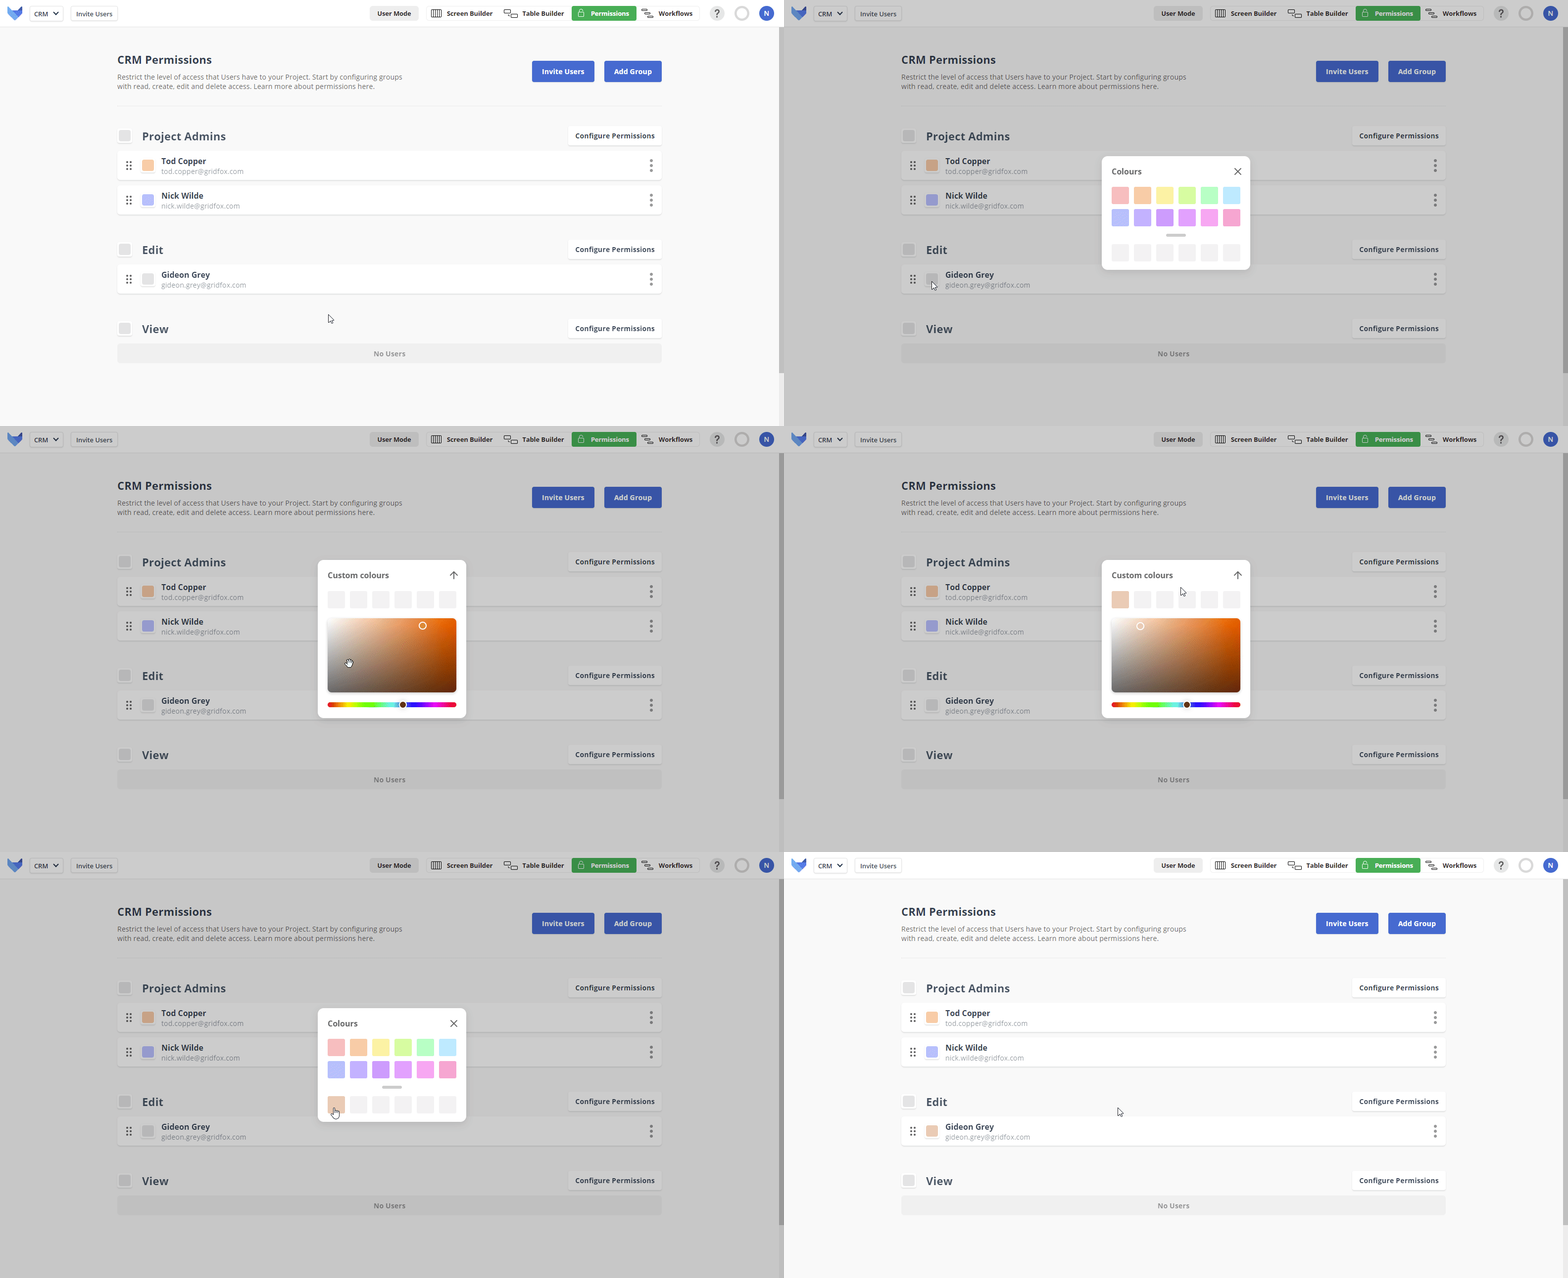
You can assign a colour to a User in two ways: using the Permissions page, or in the Invite User process.
Start by selecting the Users tab.

Click the square to the left of the User’s name that you would like to assign a colour to.
You can select one of the pre set colours immediately, or choose a custom colour by clicking on the grey boxes underneath the 12 pre set colours.

NOTE
The assigned colour is for the Project you are viewing only. If the User is in multiple Projects, setting a colour in one will not affect the assigned colour in others.
Alternatively, you can click the Invite Users button in the top right of your Project. This will show a list of all invited Users and a colour can be set for each.
