Grid Views
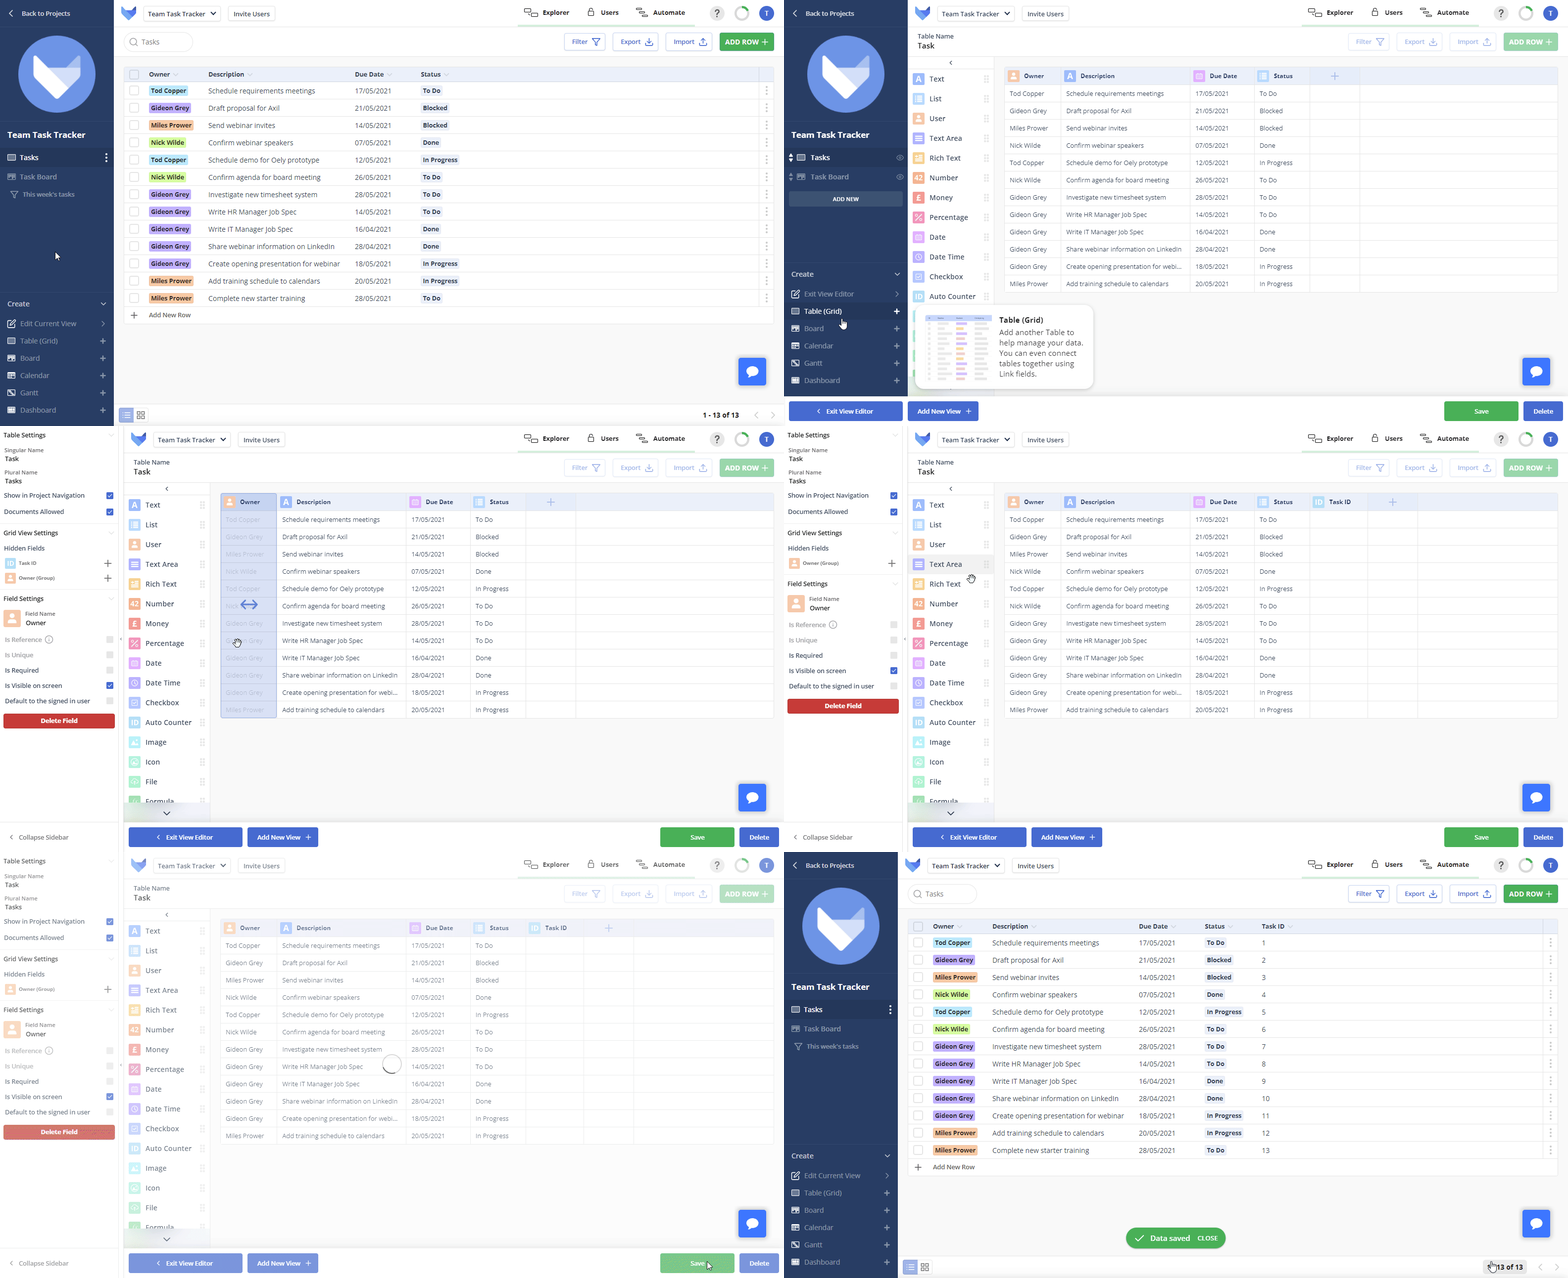
In Gridfox, Grid Views allow you to see a list of items within a Table. These grids of data can then be sorted, searched and filtered.
TIP
Every Table that is created will be given a Grid View by default.
You can configure a Grid View using the View Editor, which can be access at any time by clicking Edit Current View in the bottom left corner.
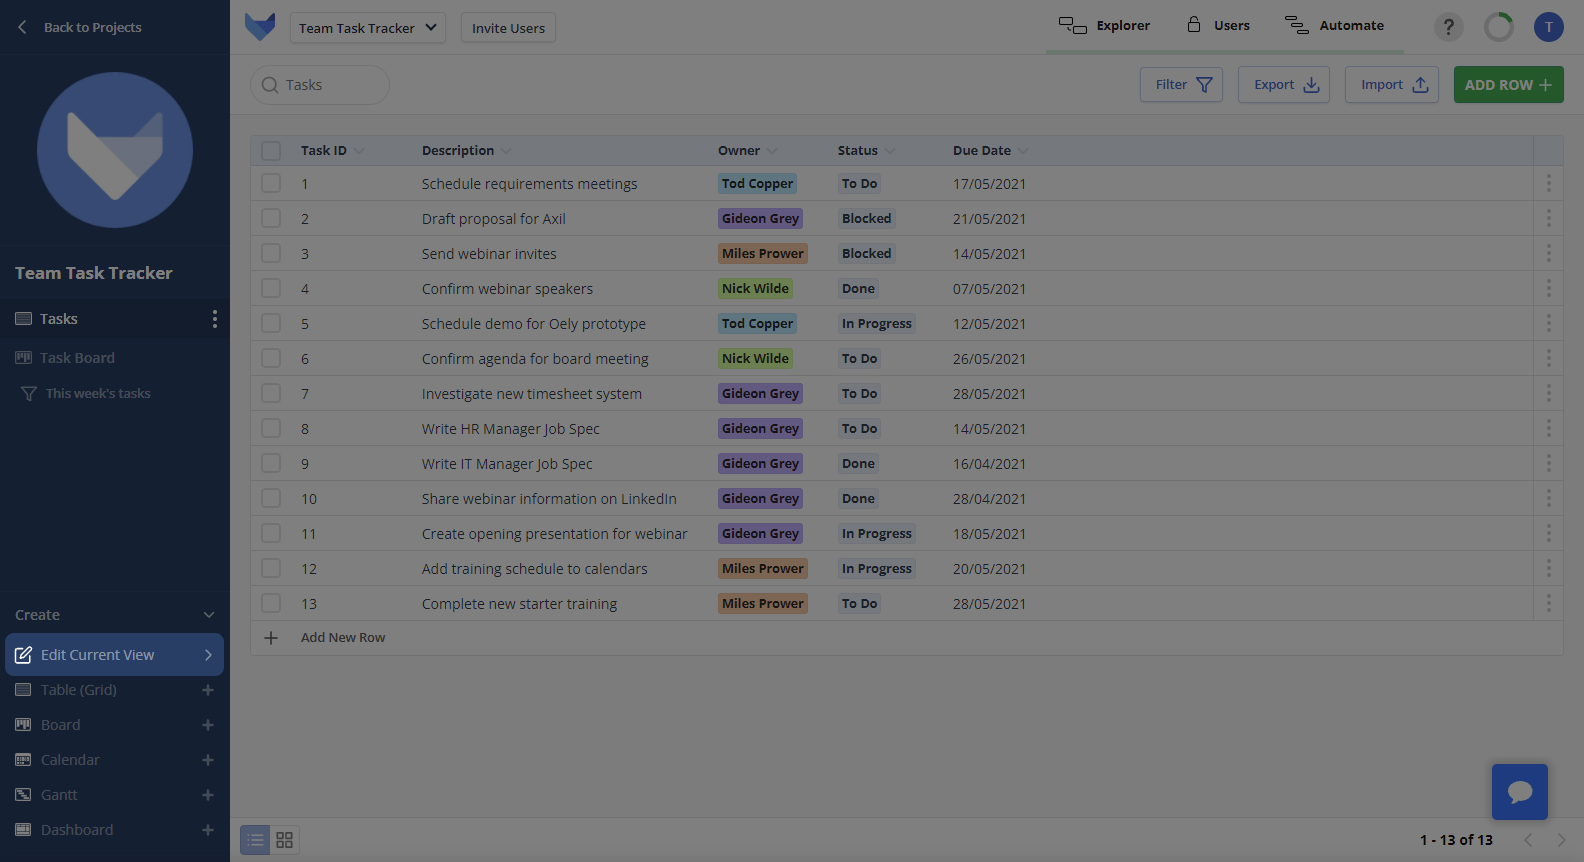
Using the View Editor you can:
- Create new Fields for the Grid View’s Table
- Change existing Fields for the Grid View’s Table
- Delete existing Fields for the Grid View’s Table
- Configure the layout of the Grid View
Configuring Grid View Layouts
Reordering Fields
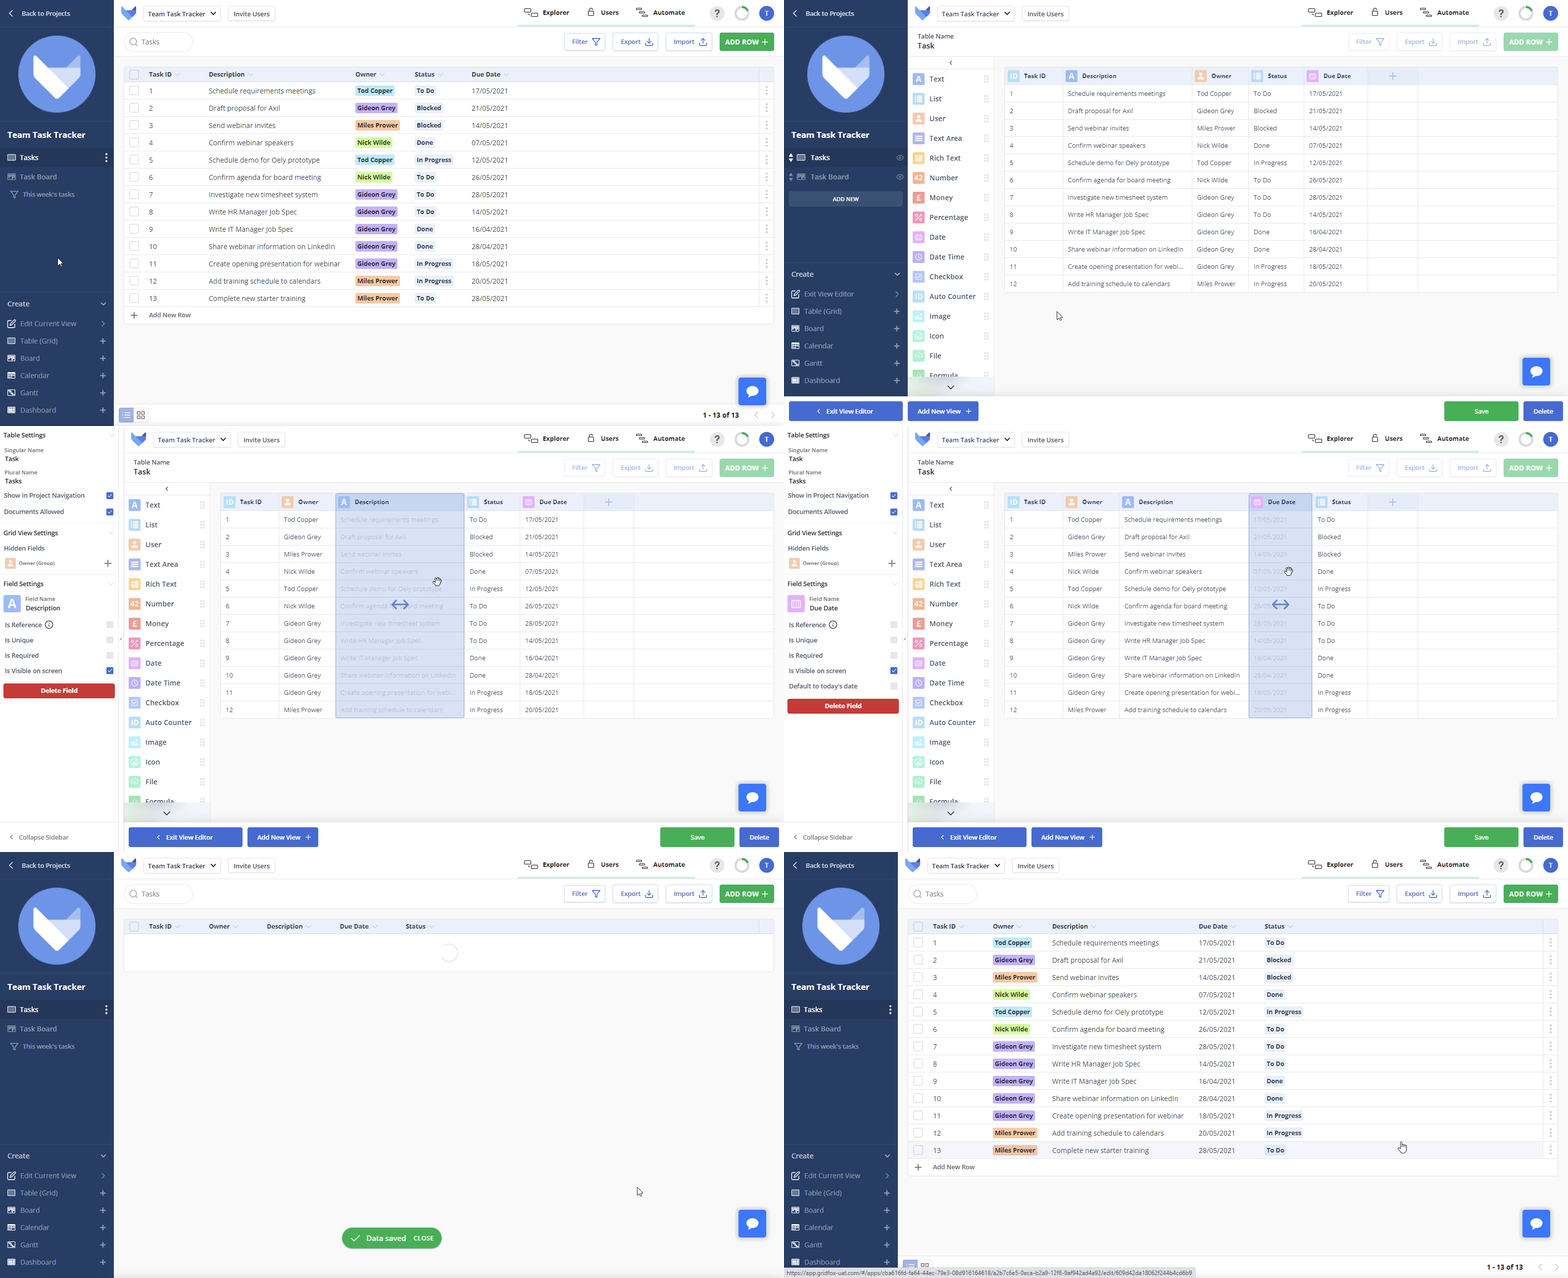
To change the order in which Fields show on a Grid View, start by clicking Edit Current View. Then drag and drop them in within the Grid.
Click Save to confirm your changes.
Display Mode
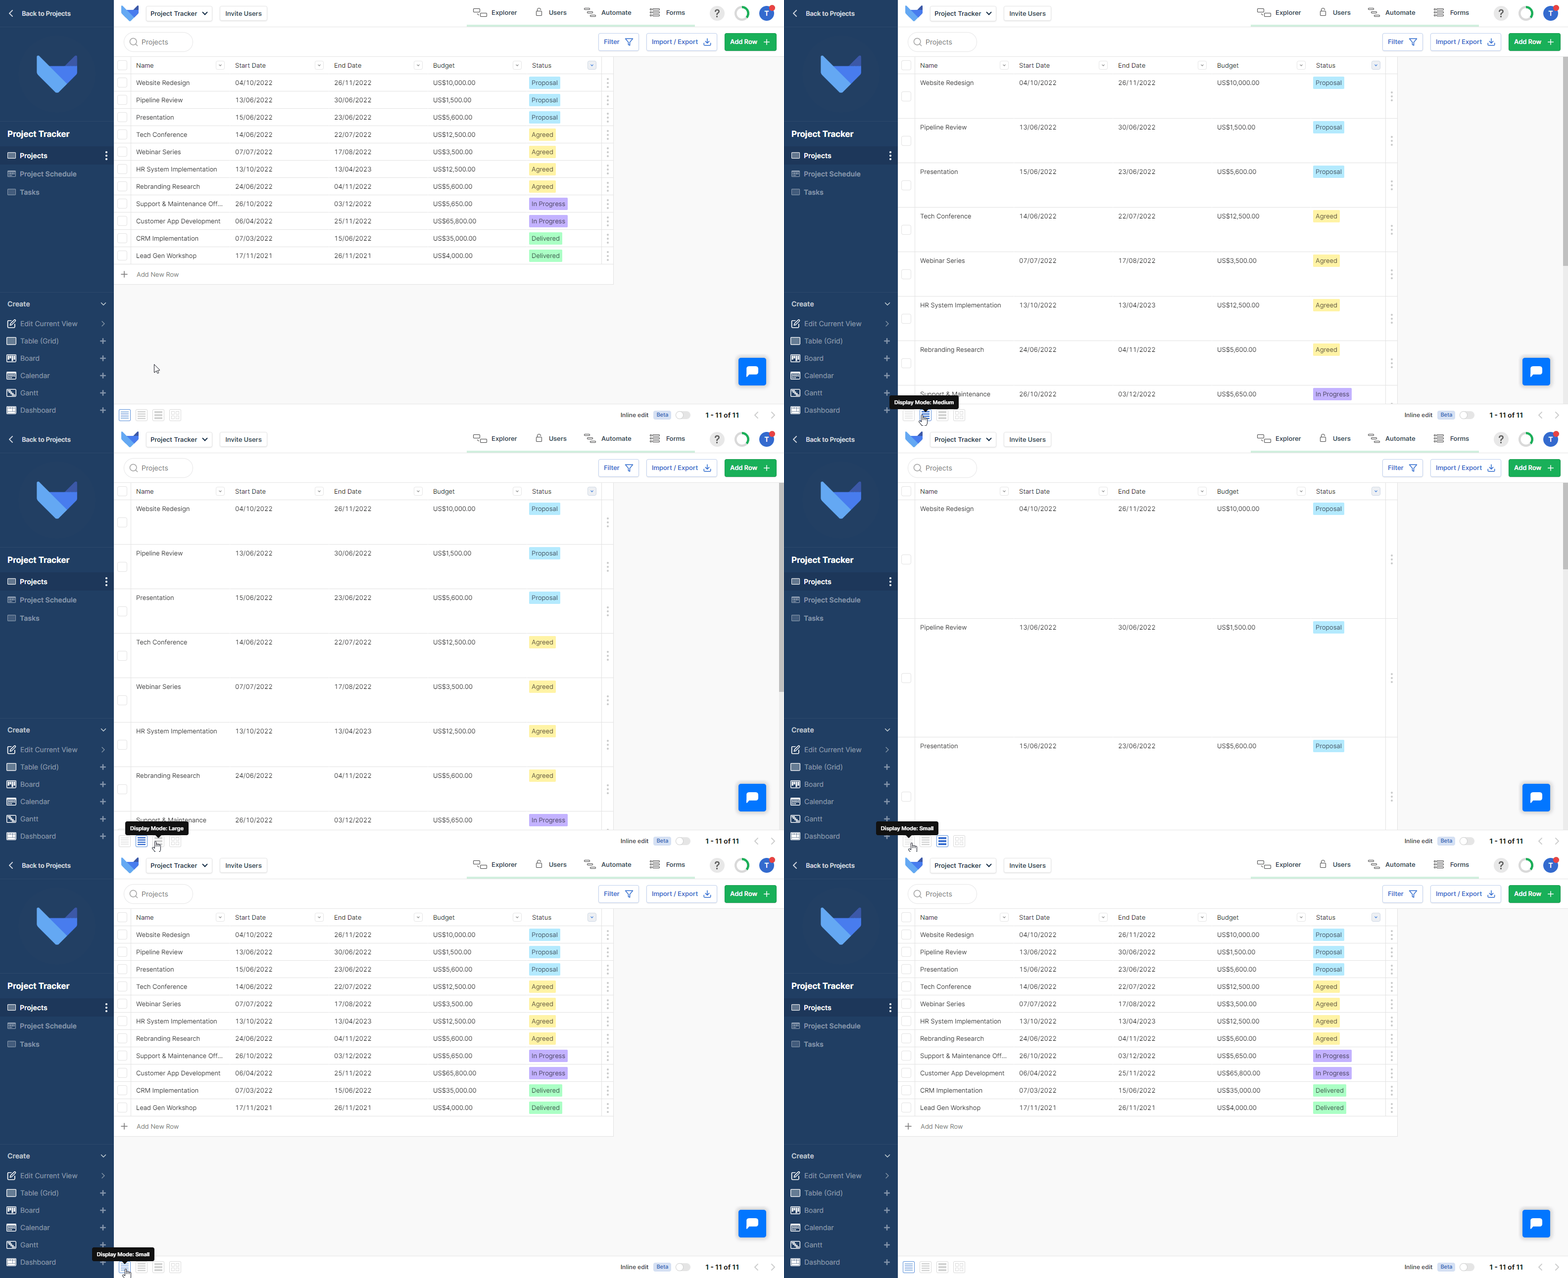
You can configure the Display Mode for your Table at the bottom left of your project. Here you can Choose to display your tables with either a Small, Medium or Large Row Height. As a fourth option, you can also choose to view your data in Blocks.
Simply click on your chosen display option and your Grid View will update automatically.
Hiding Fields
You may not want to show all the Fields in the Table on a Grid View to avoid it looking too cluttered for your users.
To hide a Field from the Grid View, open up the View Editor by clicking Edit Current View. Then drag the Field into the Drop Field to Hide section.
Click Save to confirm your changes.
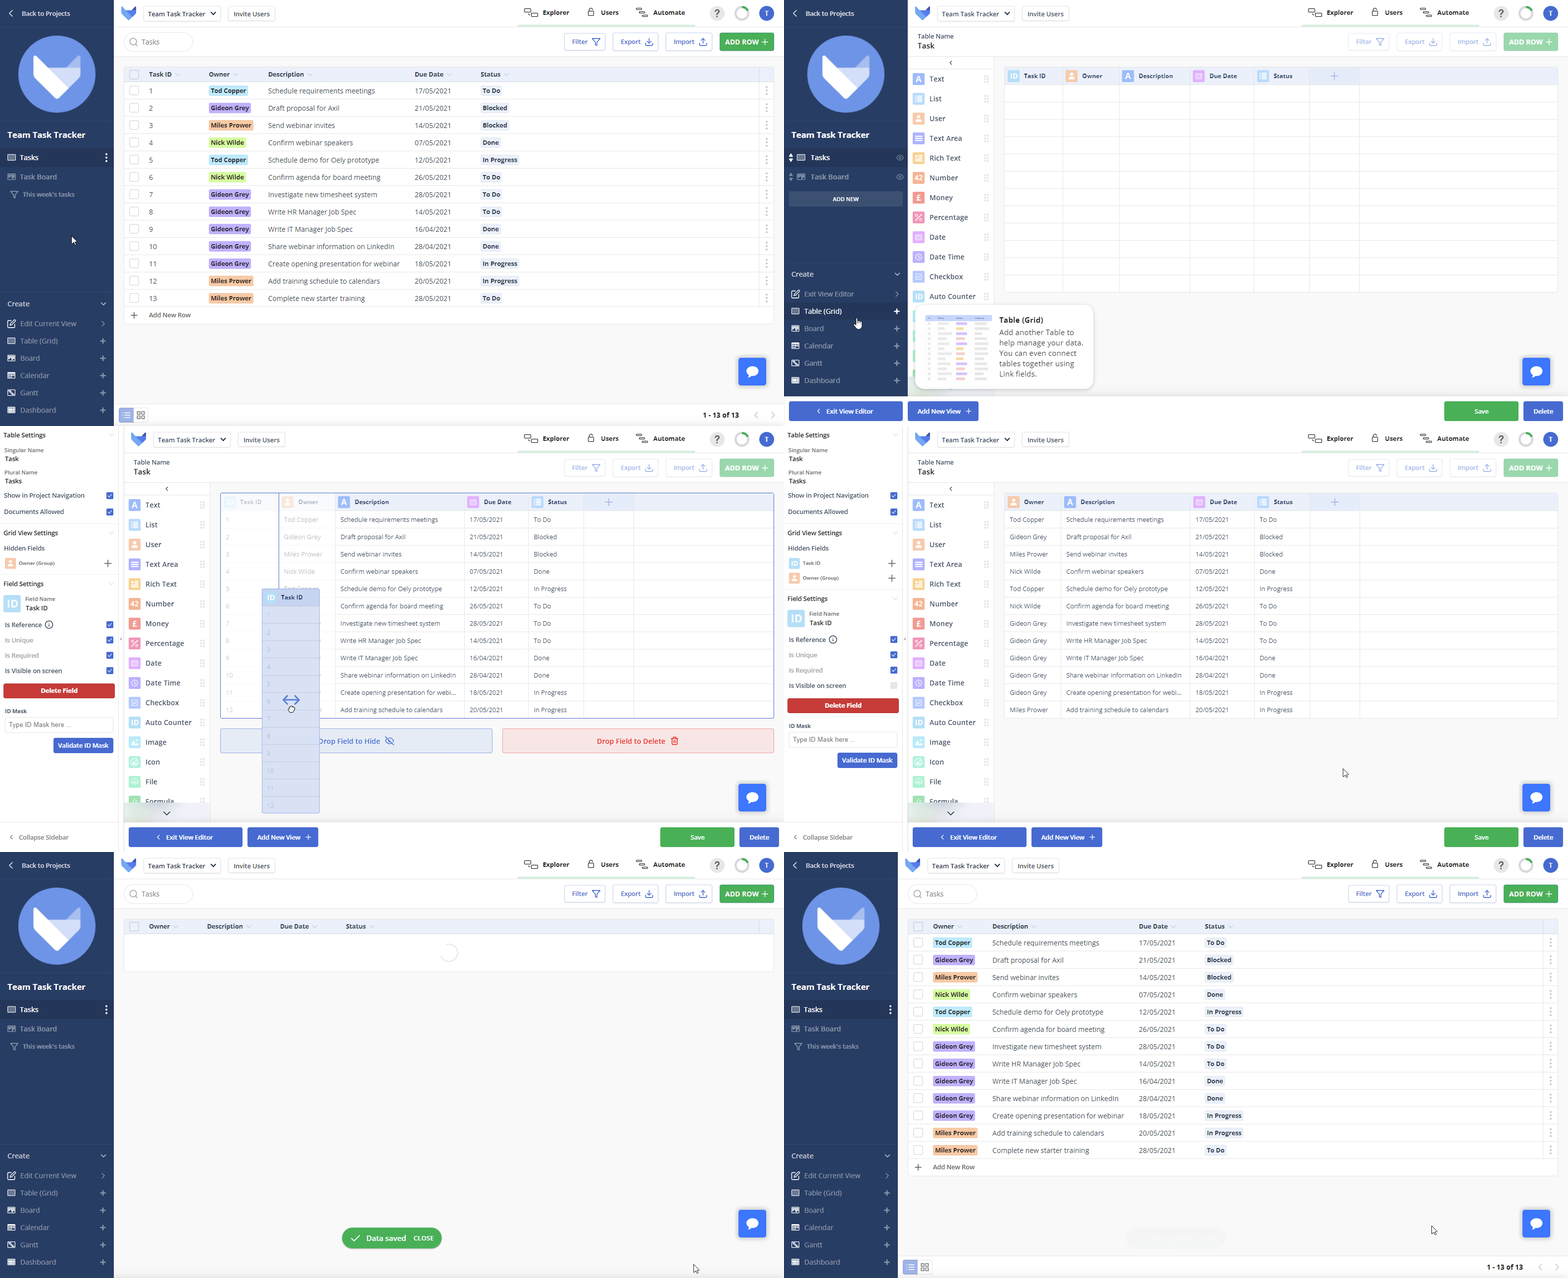
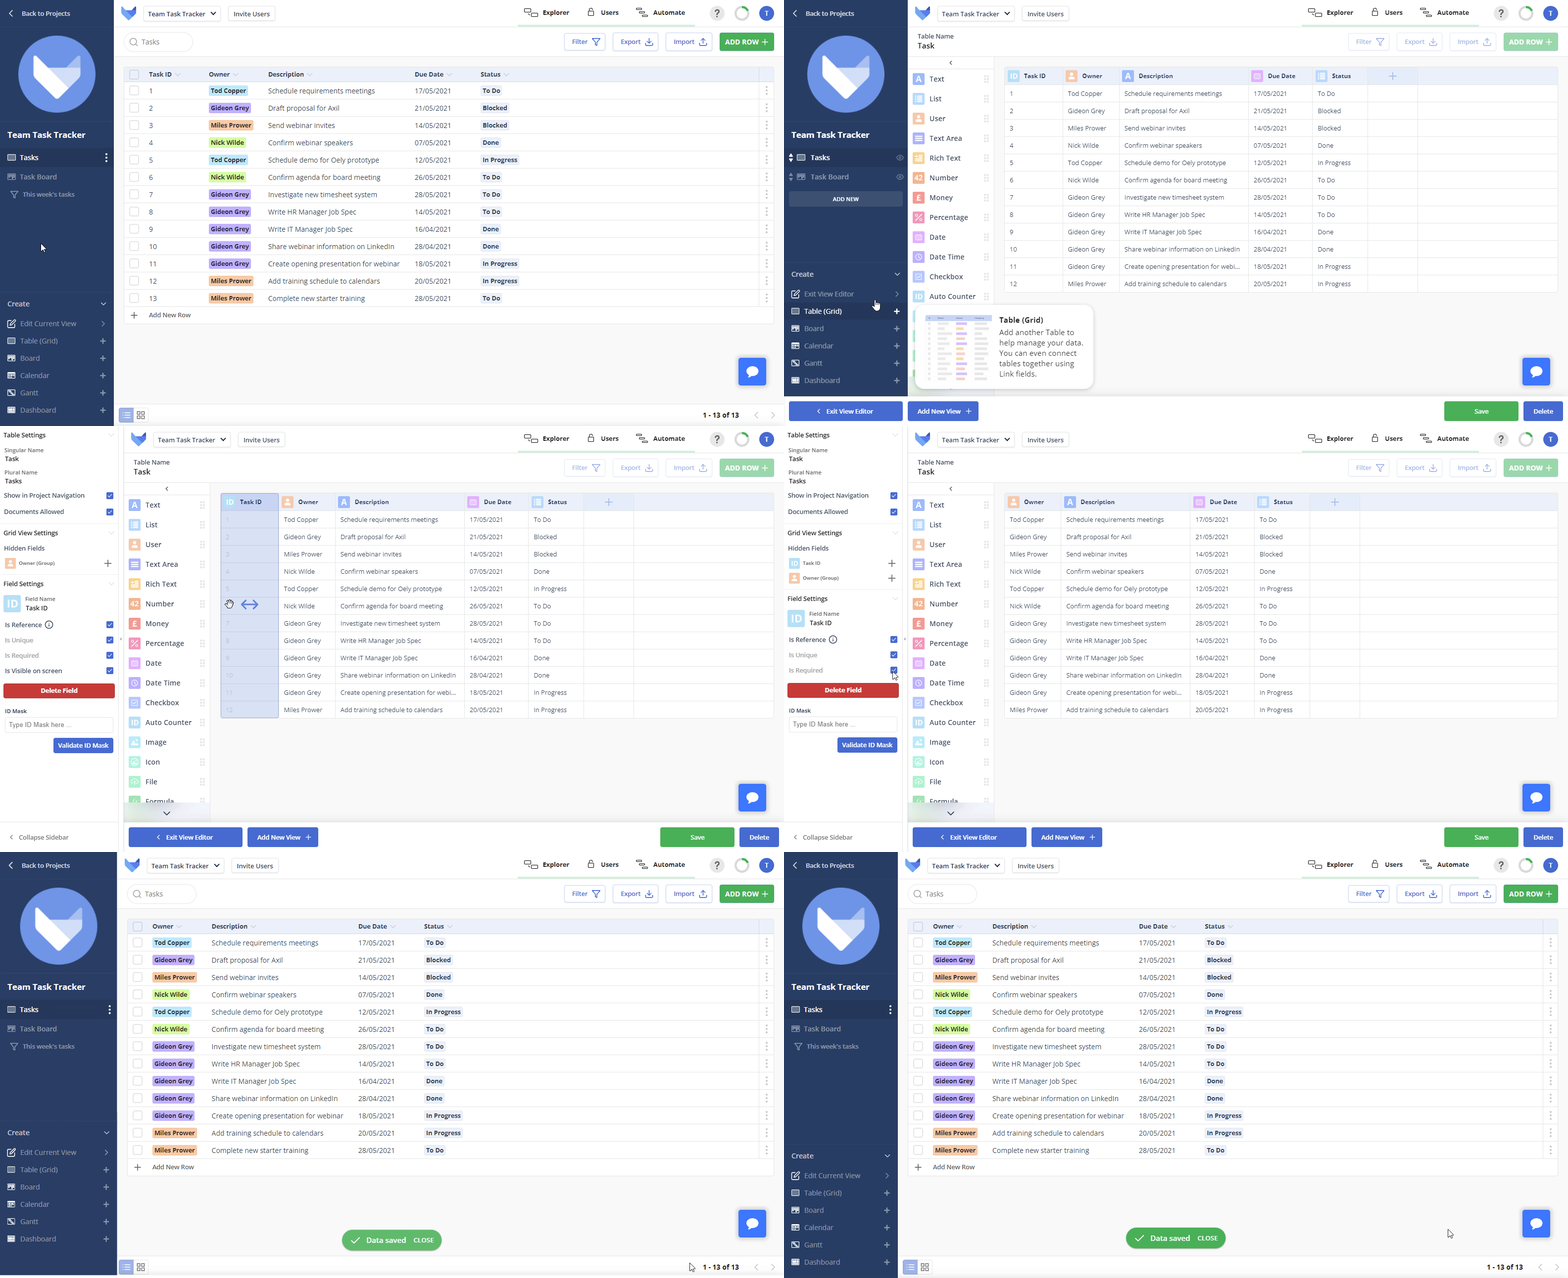
Alternatively, click on the Field that you would like to hide. This opens the settings side panel. Uncheck the ‘Is Visible on screen’ checkbox.
Click Save to confirm your changes.
TIP
If you want to hide Fields for certain groups of users, use permissions to do this.
Showing Fields
To show a Field that has previously been hidden, click on a Field to open the settings side panel.
In the ‘Results Screen Settings’ section, click the plus icon against each of the Fields you would like to show on the Grid View.
Click Save to confirm your changes.
