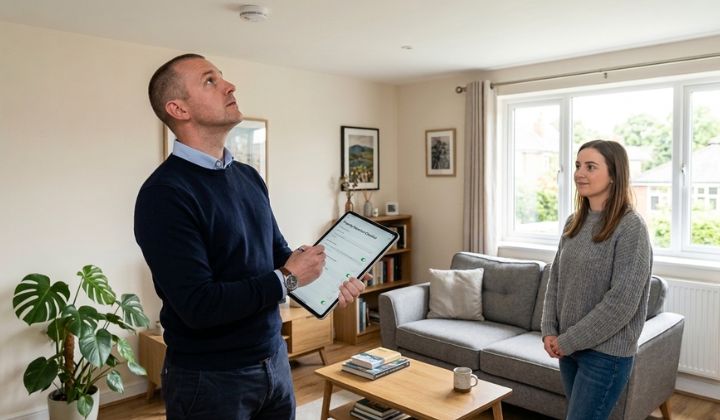
Landlord Property Inspection: Essential Steps for Effective Tenant Property Reviews
Landlord property inspections are a key part of managing rental properties. They help you check the condition of your property and make sure tenants are following their tenancy agreement. Regular inspections protect your investment and help you spot problems before they become expensive repairs.
These inspections let you review safety features, structural conditions, and general maintenance whilst keeping good relationships with your tenants. Understanding how to carry out proper inspections means knowing what to look for, when to schedule visits, and how to document what you find. This process involves following legal requirements whilst using practical methods to assess your property thoroughly.
1. Schedule inspections with at least 24 hours’ notice to tenants
You need to give your tenants proper notice before entering the property for an inspection. Most areas require at least 24 hours’ written notice. This gives tenants time to prepare and ensures you respect their right to privacy.
Send your notice in writing through email, text, or a letter. Include the date and time of the inspection in your message. Be specific about why you need to enter the property.
Your tenants have a right to know when you’ll be coming. They may need to arrange their schedule or make sure someone is home. Some tenants prefer to be present during inspections.
Plan your inspections during reasonable hours. Early mornings or late evenings are usually not appropriate. Weekday business hours or weekend afternoons often work better for both parties.
Keep a record of all inspection notices you send. This documentation protects you if any disputes arise later. It shows you followed proper procedures and respected tenant rights.
2. Conduct inspections during reasonable hours, preferably business hours
You should schedule property inspections during reasonable hours to respect your tenants’ privacy and maintain a professional relationship. Business hours, typically between 9:00 AM and 5:00 PM on weekdays, are the most appropriate times to conduct inspections.
Reasonable hours protect both your rights as a landlord and your tenants’ right to quiet enjoyment of the property. Most tenancy agreements and local laws require you to provide advance notice and arrange visits at suitable times.
Evening inspections may be necessary in some cases, but you should avoid early mornings, late nights, or weekends unless your tenant specifically agrees to these times. When you propose an inspection time, consider your tenant’s work schedule and daily routine.
If you conduct inspections outside reasonable hours without proper consent, you risk damaging the landlord-tenant relationship and potentially facing legal consequences. You must act reasonably at all times when exercising your right to inspect the property.
Always confirm the inspection time in writing and give your tenant sufficient notice as required by law, which is typically at least 24 to 48 hours in most jurisdictions.
3. Use a checklist covering cleanliness, damage, and safety
A well-organised checklist helps you conduct thorough property inspections. Your checklist should cover three main areas: cleanliness, damage, and safety.
Start by checking cleanliness standards in each room. Note whether floors, walls, and surfaces are properly maintained. Check if bins have been emptied and if the property appears well-kept.
Next, inspect for damage throughout the property. Look at walls for holes or marks, and examine flooring for stains or scratches. Check doors, windows, and fixtures for any signs of wear or breakage. Document any issues with photos and written notes.
Safety checks form the third essential part of your inspection. Test smoke alarms and carbon monoxide detectors in every required location. Examine glazing to ensure safety glass is installed where needed. Check that balustrades are secure and that gutters are clear.
Using the same checklist for every inspection keeps your process consistent. This approach helps you spot issues quickly and creates reliable records. Keep completed checklists with your property files for future reference.
You need the right tools to conduct thorough property inspections. A flashlight and camera are essential items you should bring to every inspection.
A torch helps you inspect dark areas properly. You can check cupboards, lofts, basements, and other poorly lit spaces where problems often hide. Bring a reliable torch with fresh batteries or a rechargeable model so you have adequate lighting throughout the inspection.
Your camera serves as important documentation during inspections. Take photographs of any damage, maintenance issues, or areas of concern you find. These images create a clear record of the property’s condition at the time of inspection.
Photos protect both you and your tenants by providing evidence if disputes arise later. They also help you track changes between inspections and monitor whether repairs have been completed properly.
Consider carrying a few additional tools like a damp metre to check for moisture problems. Small tools such as a scrapper can help you examine surfaces more closely when needed. Keep your inspection kit simple but functional so you can complete assessments efficiently.
5. Check smoke alarms and carbon monoxide detectors for safety compliance
You need to verify that smoke alarms and carbon monoxide detectors are present and working during your property inspection. Most local regulations require these devices in rental properties, particularly where gas appliances or fuel-burning equipment exists.
Start by locating all detectors throughout the property. Check that they are installed in the correct locations according to building regulations. Press the test button on each device to confirm it produces an audible alarm.
Inspect the manufacture date on each unit. Smoke alarms typically need replacing every ten years, whilst carbon monoxide detectors may have shorter lifespans. Replace any expired devices immediately.
Look for visible damage, such as cracks or missing covers. Check that batteries are fresh if the units require them. Many modern detectors have sealed, long-life batteries that last the device’s lifetime.
Document the condition and location of each alarm during your inspection. Note any missing detectors or units that need replacement. You are responsible for ensuring these safety devices function properly, as they can prevent serious injuries or deaths from fire and carbon monoxide poisoning.
6. Review tenancy agreement terms during the inspection
Your property inspection offers a practical opportunity to verify that tenancy agreement terms are being followed. You should check specific conditions outlined in the contract during your walkthrough.
Look at clauses related to property maintenance and usage. If your agreement prohibits certain activities like smoking indoors or keeping pets, observe whether these rules are respected. Check for signs that might indicate breaches of these terms.
Review any maintenance responsibilities assigned to your tenant. Some agreements require tenants to handle minor repairs or garden upkeep. Your inspection lets you assess whether they’re meeting these obligations.
Pay attention to occupancy limits specified in the agreement. Whilst you cannot intrude on privacy, you can note whether the property appears consistent with the agreed number of residents.
Document your findings objectively. If you notice any discrepancies between the agreement terms and the property’s condition, discuss these with your tenant promptly. This approach helps maintain clear communication and prevents small issues from becoming larger disputes.
Keep your tenancy agreement accessible during inspections. Having it to hand allows you to reference specific clauses if questions arise.
7. Inspect plumbing and electrical fixtures for leaks or faults
Check all visible plumbing fixtures during your inspection. Look at taps, pipes, and connections under sinks for signs of water damage or active leaks. Small drips can turn into major problems if left unaddressed.
Examine the areas around toilets, radiators, and boilers for moisture or stains. These often indicate slow leaks that tenants might not have reported. Pay attention to water pressure when running taps, as low pressure may point to hidden leaks in the system.
For electrical fixtures, test all switches and outlets to ensure they work properly. Ground fault circuit interrupters should be tested to confirm they trip when needed. Look for any scorch marks, unusual warmth, or burning smells around sockets and switches.
Check that light fixtures are secure and functioning. Note any flickering lights or outlets that don’t work, as these could signal wiring faults.
You cannot inspect every inch of hidden piping or wiring, but a thorough visual check of accessible areas helps identify issues early. Document any faults you find with photos and dates. This protects both you and your tenant whilst ensuring the property remains safe and well-maintained.
8. Look for signs of damp, mould, or pest infestations
Check walls, ceilings, and corners for damp patches or water stains. These often appear as discolouration or peeling paint. Pay attention to areas near windows, pipes, and external walls where moisture problems typically start.
Look for visible mould growth, which may appear as black, green, or white spots. Check behind furniture and in cupboards where air flow is limited. A musty smell often indicates hidden mould even when you cannot see it.
Inspect for pest activity throughout the property. Look for droppings, gnaw marks, or damaged packaging in kitchen areas. Check for signs of bedbugs near beds and furniture joints.
Examine window frames and skirting boards for wood damage or rot caused by moisture. Test surfaces for soft spots that might indicate water damage beneath.
Document any issues you find with photographs and detailed notes. Record the location, size, and severity of problems. This information helps you address issues promptly and maintain clear records.
If you discover significant damp, mould, or pest problems, arrange for professional inspection and treatment. Early detection prevents more serious damage and protects tenant health and safety.
9. Confirm tenants are maintaining garden or exterior areas if applicable
If your rental property includes outdoor spaces, you need to check whether tenants are keeping them properly maintained. Review the lease agreement to understand who is responsible for garden upkeep and exterior area maintenance.
Look for overgrown lawns, weeds, or neglected flower beds during your inspection. Check that pathways remain clear and safe for walking. Note any rubbish accumulation or items left scattered across the garden.
Examine fences, gates, and outdoor structures for damage. Verify that tenants are not storing inappropriate items outside that could cause damage to the property or create safety hazards.
Take photographs of the exterior areas to document their current condition. This creates a record you can reference during future inspections.
If you notice maintenance issues, discuss them with your tenant promptly. Some tenants may need clarification about their responsibilities regarding outdoor spaces. Provide clear guidance on what standards you expect them to maintain.
Consider whether the tenant has the proper tools and resources to maintain outdoor areas adequately. Address any concerns in writing and set reasonable timeframes for improvements if necessary.
10. Document all findings clearly and share with tenants
You need to record every issue you find during your property inspection. Take photos of any damage, wear, or maintenance concerns. Write notes that describe the problem, its location, and the date you discovered it.
Your documentation should be straightforward and factual. Include measurements when relevant and avoid vague descriptions. Keep all records organised in a file or digital folder that you can easily access later.
After you complete your inspection, share your findings with your tenants promptly. Send them a copy of your inspection report along with any relevant photos. This transparency helps build trust and prevents disputes about property conditions.
Clear communication matters when discussing your findings. If you need tenants to address certain issues, explain what actions they must take and set reasonable deadlines. If you plan to make repairs, tell them when work will begin.
Keep a copy of everything you share with your tenants. These records protect both parties if disagreements arise about property conditions. They also help you track maintenance patterns over time and plan for future property improvements.
Legal Requirements and Best Practices
Landlords must follow specific legal rules when inspecting rental properties, and these rules vary by location but share common principles around notice requirements and inspection frequency.
Notice Periods and Tenant Rights
You must provide written notice before entering a tenant’s home for an inspection. Most jurisdictions require at least 24 hours’ notice, though some areas mandate 48 hours or more. The notice should include the date, time, and purpose of the inspection.
Your tenant has the right to be present during the inspection. They can refuse entry if you haven’t provided proper notice, except in genuine emergencies like fire, flood, or gas leaks. Some areas also specify acceptable hours for inspections, typically during normal business hours on weekdays.
Tenants can request to reschedule an inspection for reasonable cause. You should document all notice provided and keep records of inspection dates to demonstrate compliance with local regulations.
Frequency of Inspections
Regular inspections should occur every three to six months under most tenancy agreements. More frequent inspections may be seen as harassment and could violate tenant privacy rights.
You can conduct an initial inspection shortly after the tenant moves in, typically within the first month. A final inspection happens at the end of the tenancy to assess any damage beyond normal wear and tear.
Additional inspections require valid reasons, such as:
- Suspected property damage
- Planned maintenance or repairs
- Safety concerns like pest infestations
- Compliance with insurance requirements
Each inspection still requires proper notice. Excessive inspections without legitimate cause may breach your legal obligations and damage the landlord-tenant relationship.
Addressing Common Issues During Inspection
Property inspections often reveal maintenance problems, safety hazards, or lease violations that require immediate attention. Proper documentation and clear communication help resolve these issues quickly and maintain positive landlord-tenant relationships.
Documenting Property Condition
Take detailed photographs of every issue you discover during the inspection. Capture wide-angle shots to show the location within the room, then close-up images that clearly display the damage or problem. Include timestamps on your photos to establish when you discovered each issue.
Write specific descriptions for each problem in your inspection report. Instead of noting “kitchen damage,” record “10cm crack in kitchen worktop near sink, water staining visible on cabinet below.” This level of detail prevents disputes later.
Create a simple classification system for issues you find:
- Urgent: Safety hazards like exposed wiring, gas leaks, or structural damage
- Important: Problems affecting habitability such as broken heating, plumbing leaks, or pest infestations
- Minor: Cosmetic issues like scuffed walls, loose door handles, or worn weather stripping
Keep inspection records for at least six years. Store digital copies in cloud storage and maintain physical files as backup. These records protect you legally and help track property conditions over time.
Communicating Findings with Tenants
Schedule a time to discuss inspection results within 48 hours of completing the walkthrough. Share your findings in writing through email or letter, including photos and descriptions of issues discovered. This creates a clear record of communication.
Separate items that are the tenant’s responsibility from those you must address as the landlord. Be direct about lease violations whilst remaining professional. Explain what repairs you will handle and provide realistic timeframes for completion.
Give tenants opportunity to respond to your findings. They may have explanations for certain issues or disagree with your assessment. Listen to their concerns and adjust your report if they provide valid information you missed.
Set clear deadlines for tenant-responsible items. Put these expectations in writing and follow up if deadlines pass without action.
Frequently Asked Questions
Both landlords and tenants have specific rights and obligations when it comes to property inspections. Understanding the legal requirements for notice periods, access rights, and proper inspection procedures helps maintain a professional relationship and ensures compliance with housing regulations.
What are a tenant’s rights during a property inspection?
You have the right to receive proper notice before an inspection takes place. Your landlord must conduct the inspection during reasonable hours and cannot disrupt your quiet enjoyment of the property.
You can be present during the inspection to observe what the landlord examines and documents. If you notice any maintenance issues, you can point them out directly to your landlord during the visit.
How frequently can a landlord conduct a property inspection?
Most landlords conduct routine inspections every three to six months. Some may inspect quarterly, whilst others choose to inspect only once or twice per year.
The frequency often depends on the length of the tenancy and the property’s condition. New tenants might experience more frequent initial inspections during the first year.
What notice period must a landlord provide before inspecting a property?
You must receive at least 24 hours’ notice before your landlord enters the property for an inspection. This notice should be in writing and include the specific date and time of the visit.
The notice should clearly state the purpose of the inspection. Emergency situations may allow for immediate access, but routine inspections always require advance notification.
Can a tenant refuse access for a property inspection?
You can refuse access if your landlord hasn’t provided proper notice or wants to inspect at an unreasonable time. However, repeatedly denying reasonable inspection requests may breach your tenancy agreement.
Your tenancy contract typically includes clauses about landlord access for inspections. Refusing legitimate inspection requests could lead to legal consequences or affect your tenancy.
What constitutes a reasonable time for conducting a property inspection?
Reasonable inspection times typically fall within business hours, usually between 9:00 AM and 6:00 PM on weekdays. Weekend inspections may occur but should be arranged by mutual agreement.
The inspection itself should take between 30 minutes to one hour for a standard property. Your landlord should not stay longer than necessary to complete a thorough assessment of the property’s condition.
Are landlords allowed to take photographs during a property inspection?
Your landlord can take photographs during an inspection to document the property’s condition. These photos serve as evidence of maintenance issues, damage, or general upkeep.
The photographs should focus on the property itself rather than your personal belongings. Your landlord should inform you that they plan to take photos, and you have the right to be present whilst they do so.